Quantcast
Channel: Bookshelf and Bookcase Plans
Viewing all 2342 articles
Browse latest View live

Reclaimed Wood Rolling Shelf

$
0
0

Hi there!  I'm so excited today to get to share with you the very first of the furniture plans for our Alaska lake cabin!!!

You'll have to watch the show when it airs on DIY Network to see the whole room, and how all the pieces fit in, but I'm so thrilled to be able to share the individual plans with you before it airs.  Yipee!

After building the cabin, we ended up with quite a bit of scrap wood leftover.  We had to over-order on materials since the cabin is so remote.  Being out a 2x4 means an entire day of driving to go get another one.  

So we decided to build all of the furniture from the leftover wood.  For each piece of furniture, we would go down to the scrap wood pile, figure out what we had left in material, and make something out of it.  By the time we got to building a pantry in the kitchen, there wasn't much left, espeically wider width boards, but we did have some rough cut 2x4s leftover from the exterior siding.

I've always loved this piece from Restoration Hardware (and there's lots more similar styles made by different companies)

Not that they would ship to remote Alaska, and even if they would, $2500 is way out of my budget.  So here's my opportunity to build and use and love it!

Built for less than $50!!!  Pretty much all of the budget was spent on hardware and casters and screws.  This project was built by Ross, a good friend of ours that helped out on the cabin.
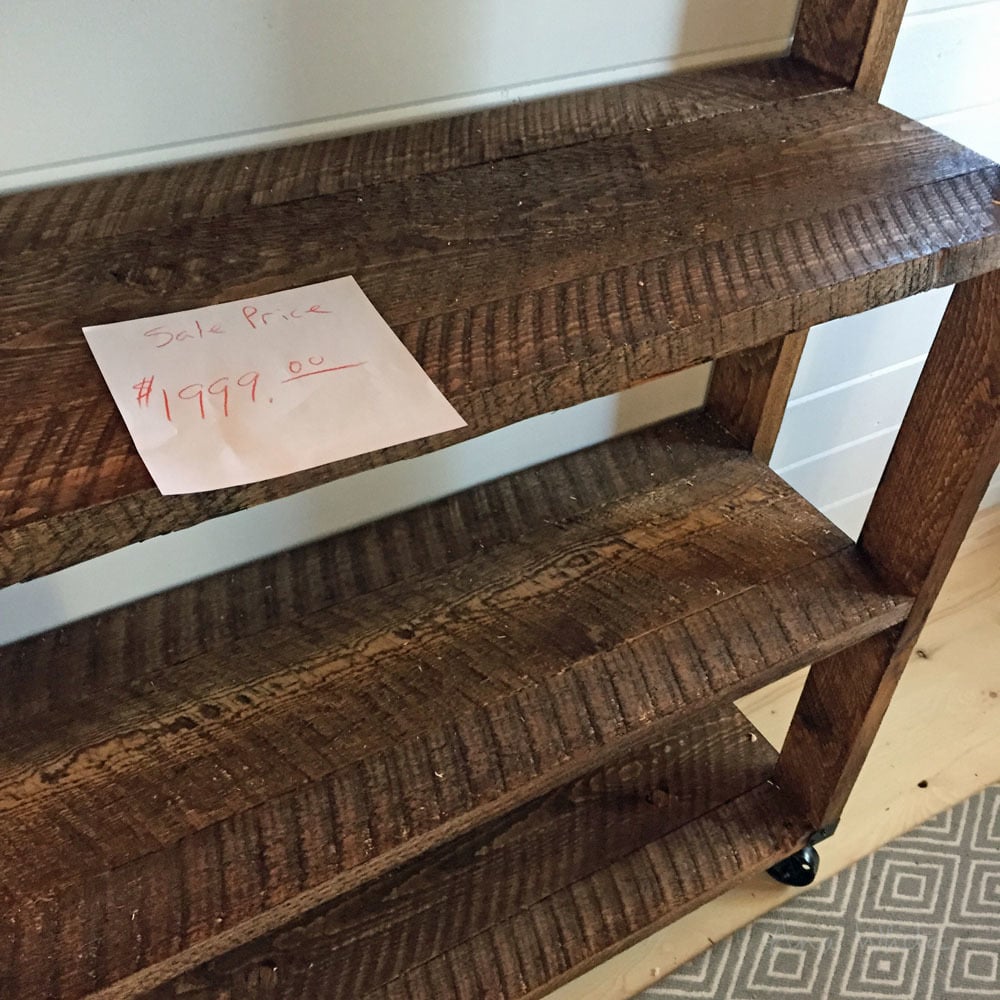
Very funny Ross.

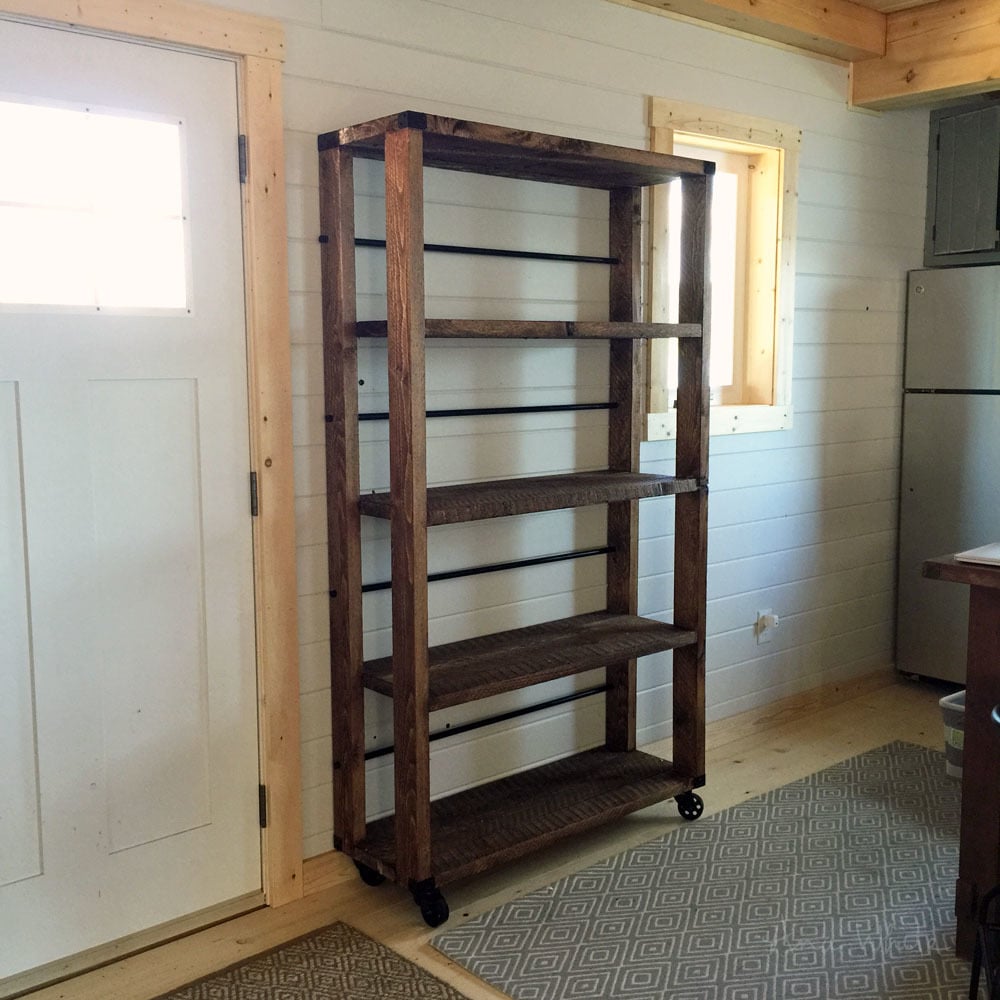
I built mine out of rough cut Alaska Sitka Spruce to get this texture on the wood.  To get rid of the splinters, I used a sander with 120 grit sandpaper over top of the rough cut. This left the saw marks, but made the final finish smooth to the touch.
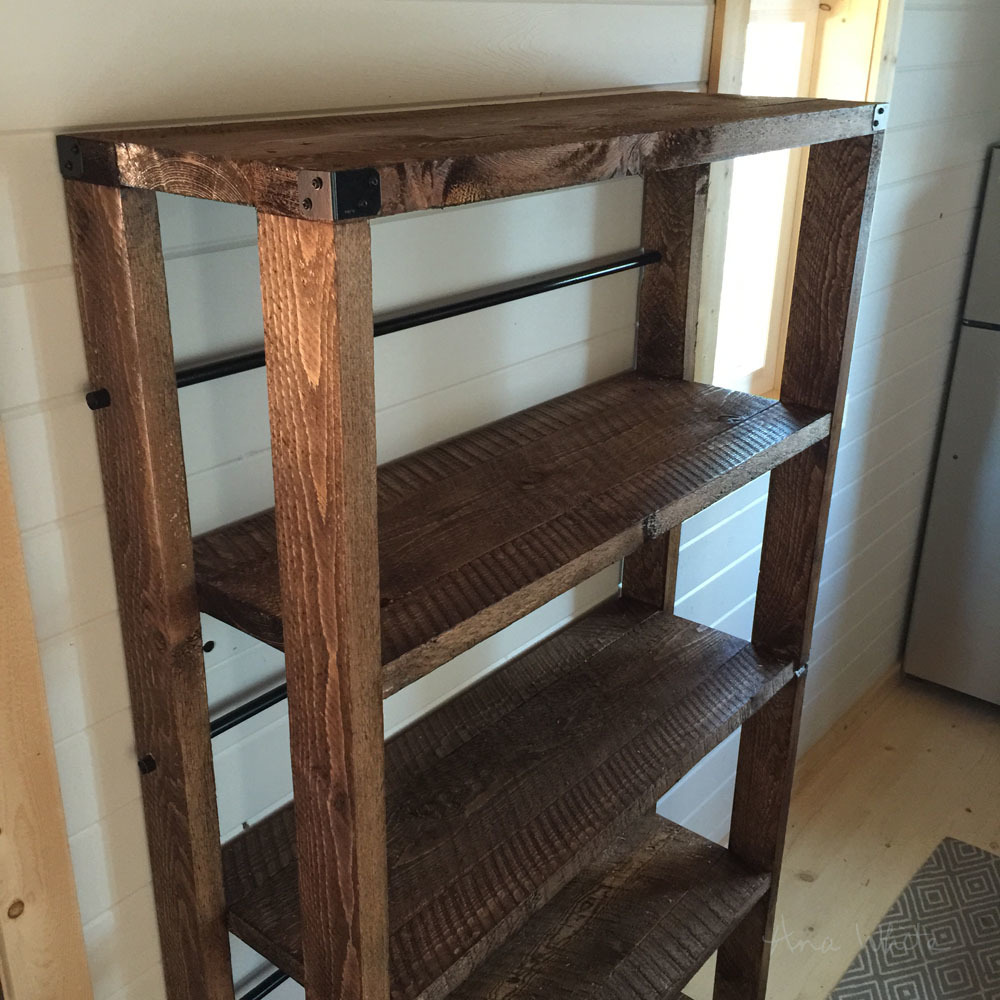
Rough cut lumber is availabe at local saw mills, and is often considerably cheaper than kiln dried lumber.  Of course, if you can find salvaged wood or reclaimed wood, that would even be better.  And using good old 2x4 boards would work too, but you may not get this same texture in your wood.

For the hardware, I used metal caster wheels, corner brackets and EMT pipe, all spray painted black with Rustoleum Spray paint in black.  The wood was stained using Varathane Early American.
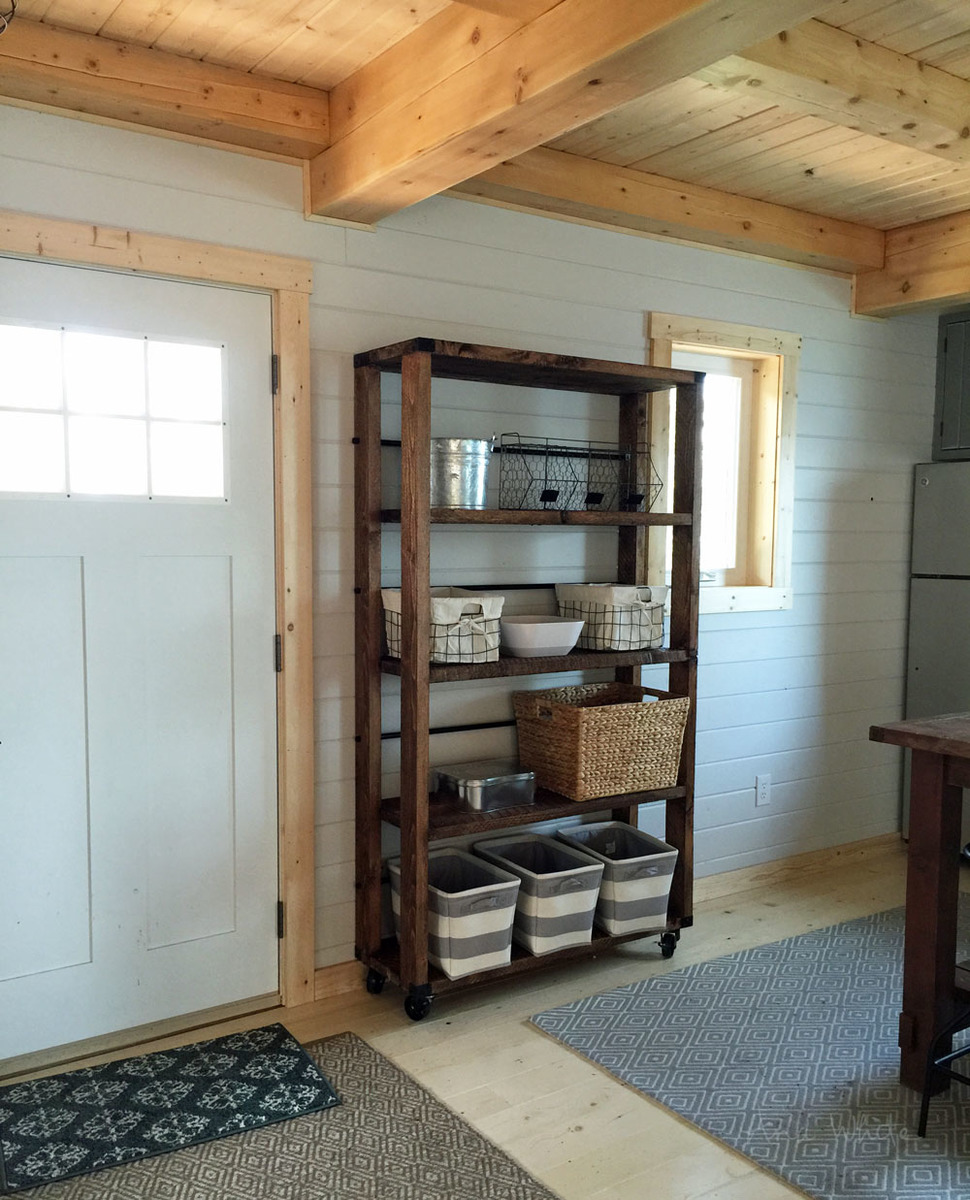
I'll be using this shelf as a pantry in the kitchen.  A few random baskets (striped totes are from Target) and it's one of my favorite pieces in the cabin!

So your turn now!!!  Plans follow, enjoy!

XO Ana


DIY Kids Bookshelf

$
0
0
DIY Kids Bookshelf

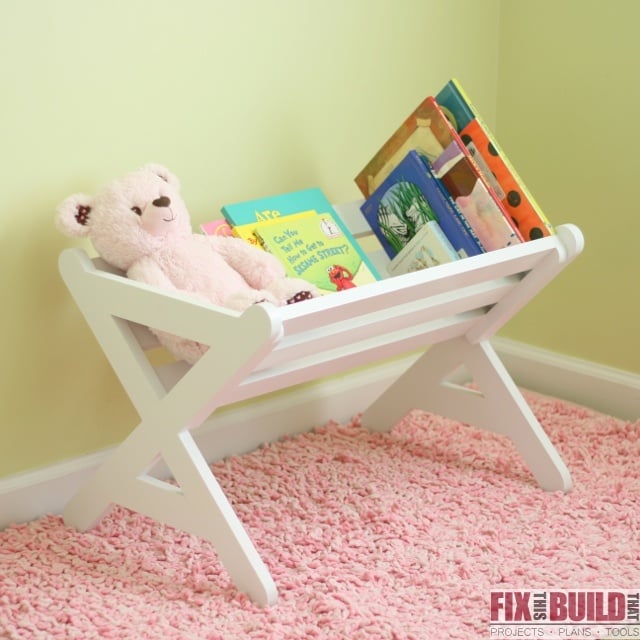
Isn't it great to see what you can make with just one board?  Well you can make your little one this DIY Kids Bookshelf with only a 8' 1x8.  You could also substitute other 1x material for these pieces, so don't feel overwhelmed if that sounds like too much cutting!


The bookshelf is put together with pocket hole joinery and brad nails for easy assembly.  Go check out the DIY Kids Bookshelf page at FixThisBuildThat.com for the full tutorial!

Floating Shelves

Octagon Rotating Bookshelf Featuring Her Tool Belt

$
0
0

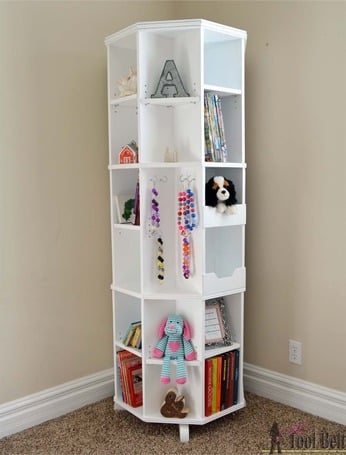
Today we are sharing this sweet little shelf! An Octagon Rotating Bookshelf, that would be a perfect addition to a small space or used in a corner. Check out all that storage!

I can visualize multiple uses for this rotating shelf, think about it....... maybe jewelry storage with a mirror on one side, a display for knicknacks, how would you use it?

Her Tool Belt has a lot of cool projects, add this one to the list!

http://ana-white.com/sites/default/files/default_images/clickforplans.jpg

Leaning Ladder Wall Bookshelf

$
0
0

Hi and Happy Monday!  

Thanks so much for all the comments and likes on the new plans I posted last week for my leaning ladder desk!

And thank you to all of you who watched the video too - I'm glad that putting the extra time into creating video is helpful to some of you!

I promised you I'd share with you the bookshelf plans too!

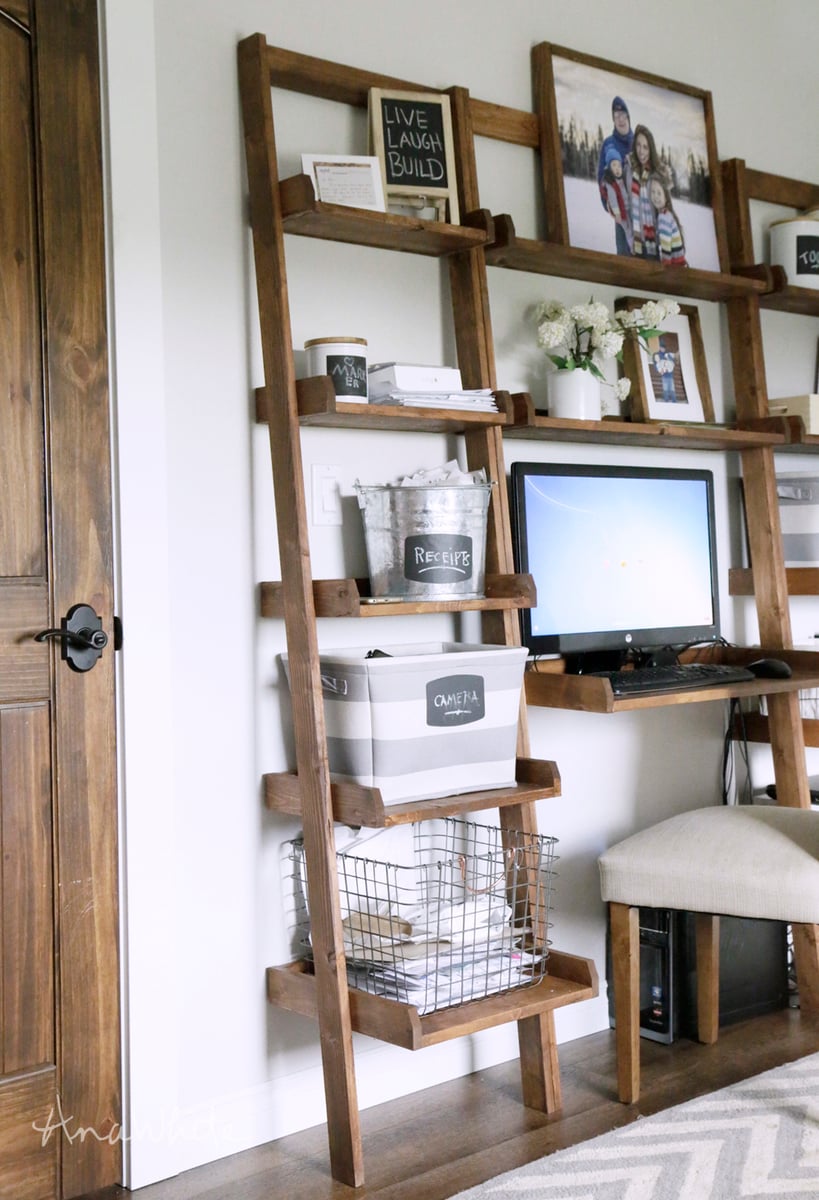
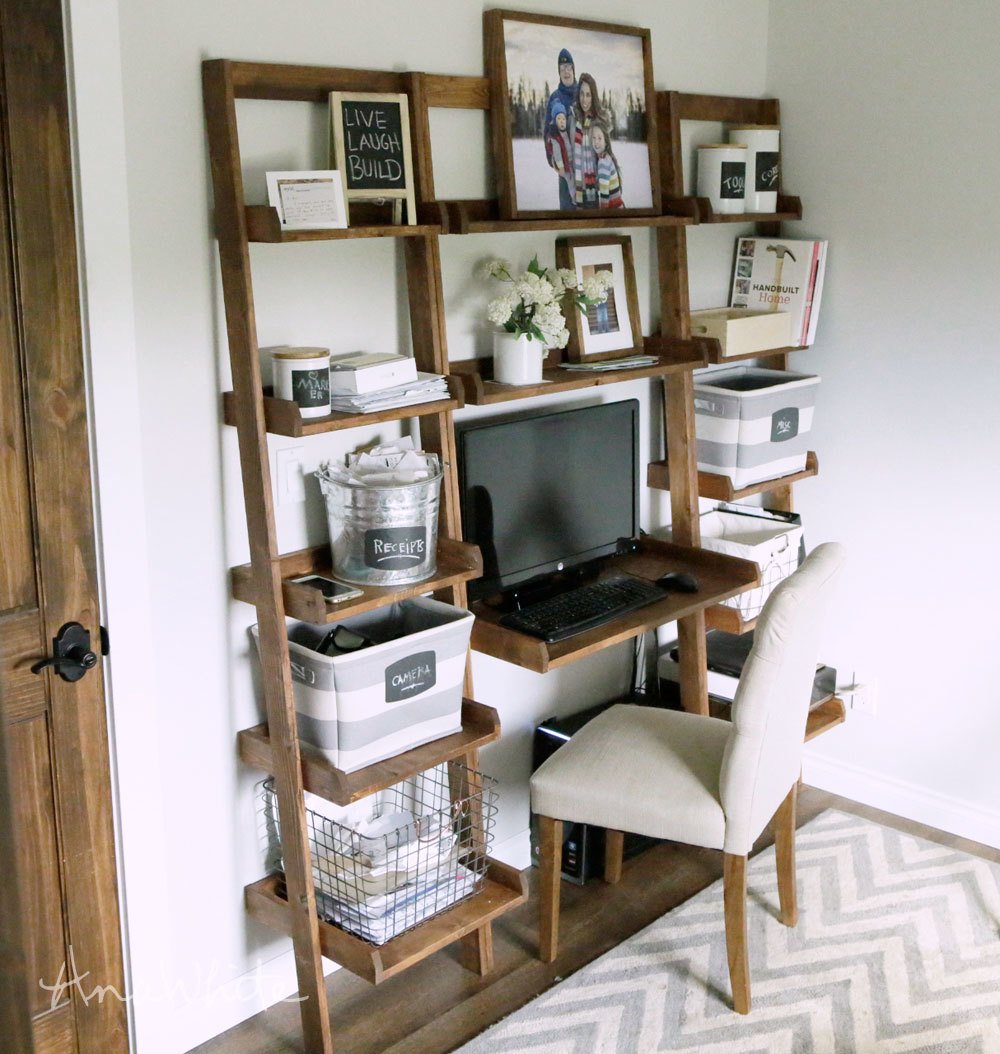
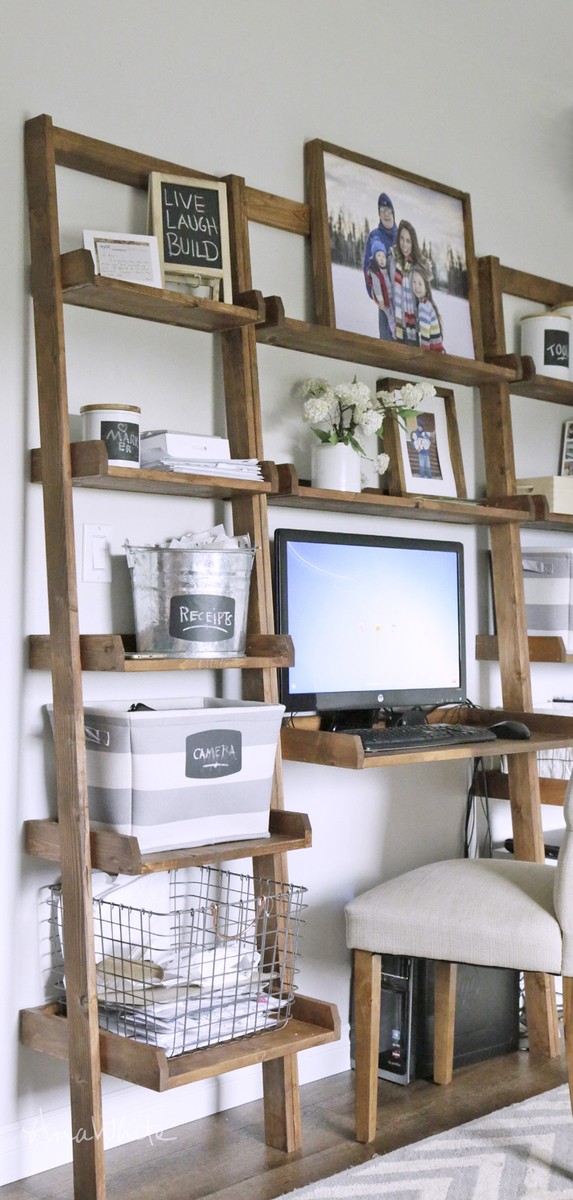
The bookshelves have been sanity savers for organizing my office.  I love having the different sized shelves to sort out my stuff.  As a working mom, with small children and limited babysitting, my desk has to be super organized.  I don't have time to look for paperwork or clear off my desk to work - it always has to be tidy and everything easy to find.  

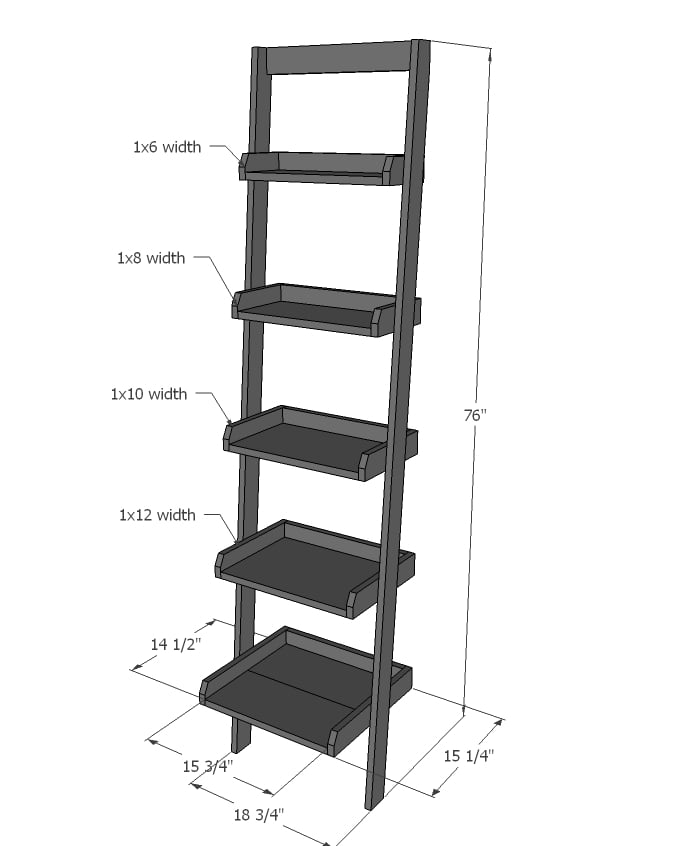
Building the bookshelves followed the same steps as the desk, but I made the overall width about half of the desk size (just under 16" to maximize cuts on 8 foot long material), and of course, more shelves.  I love that the shelves are all 1x boards - so no plywood cutting or edge banding to dress up raw plywood edges.

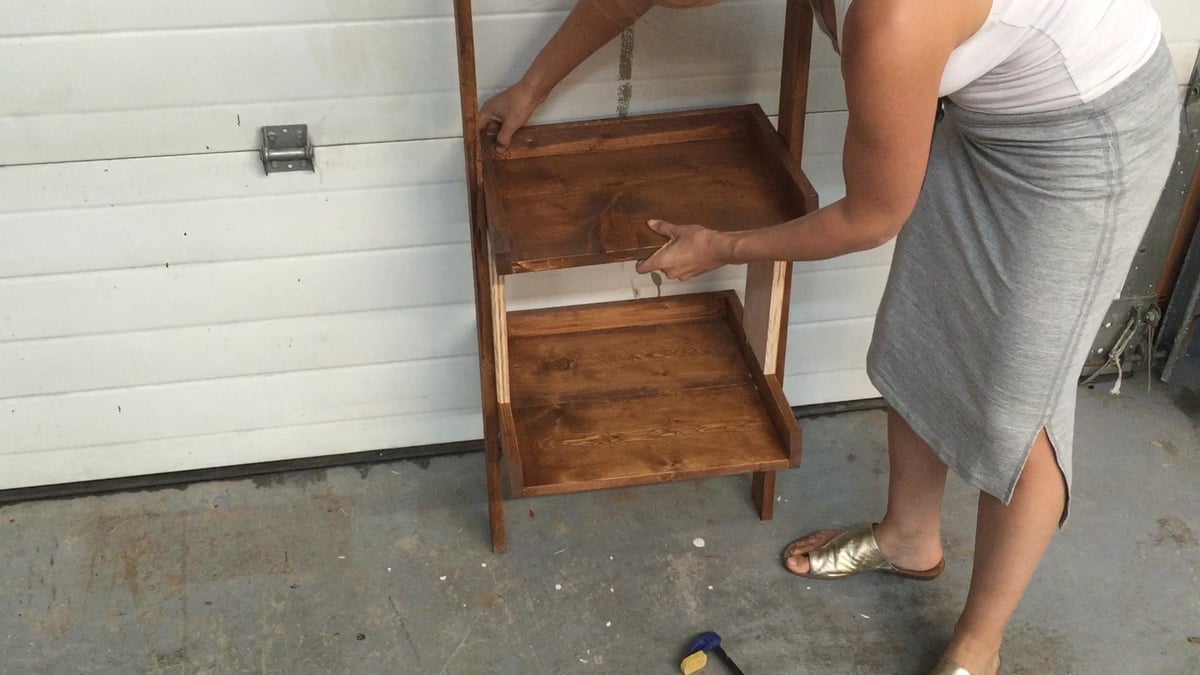
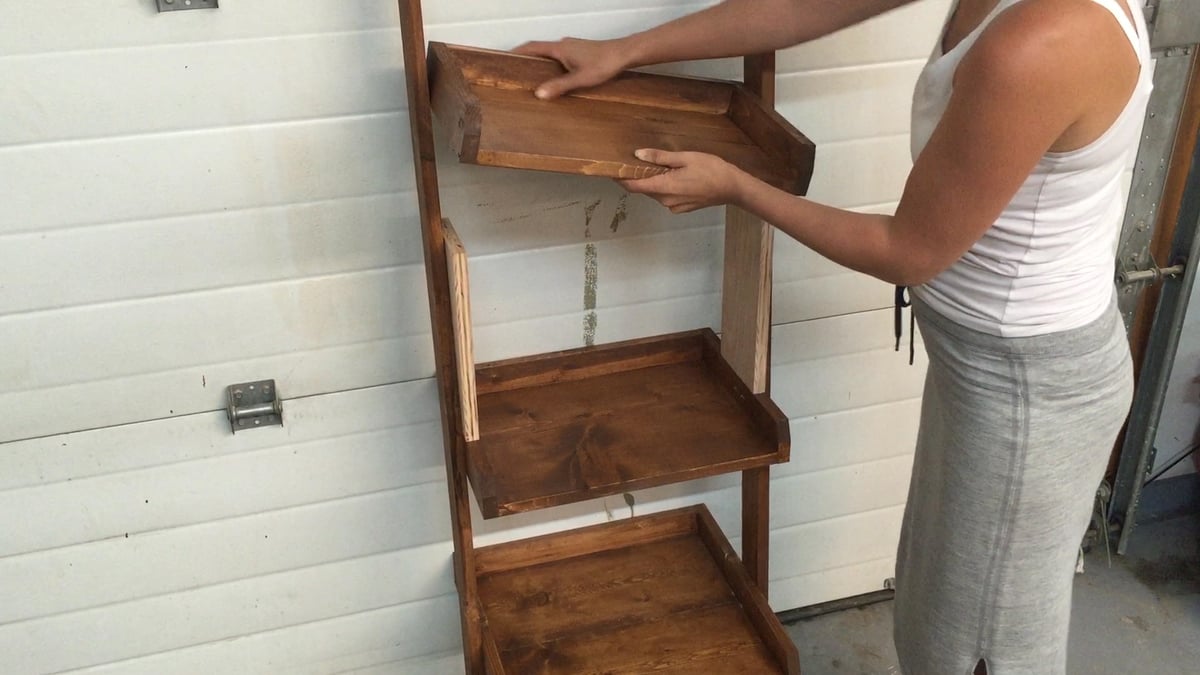
One trick that really saved me a ton of time was this:


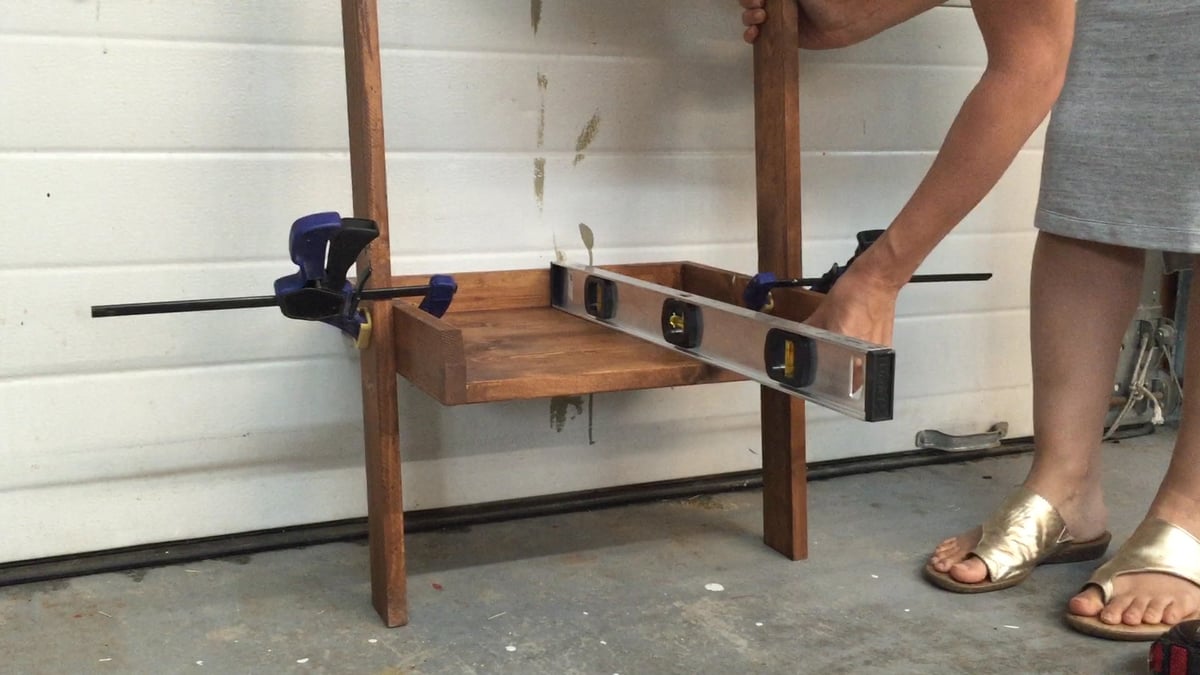
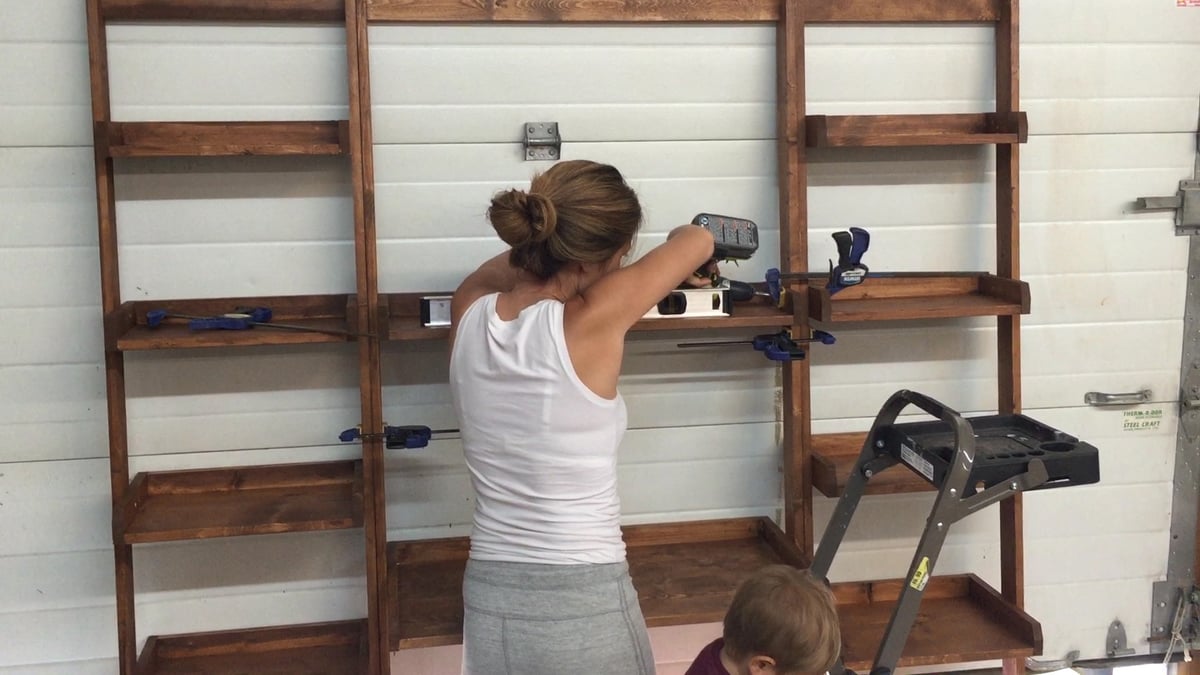
I set my first shelf, with 9-1/2" space underneath the shelf.  I used a level and clamps to get everythign just right.


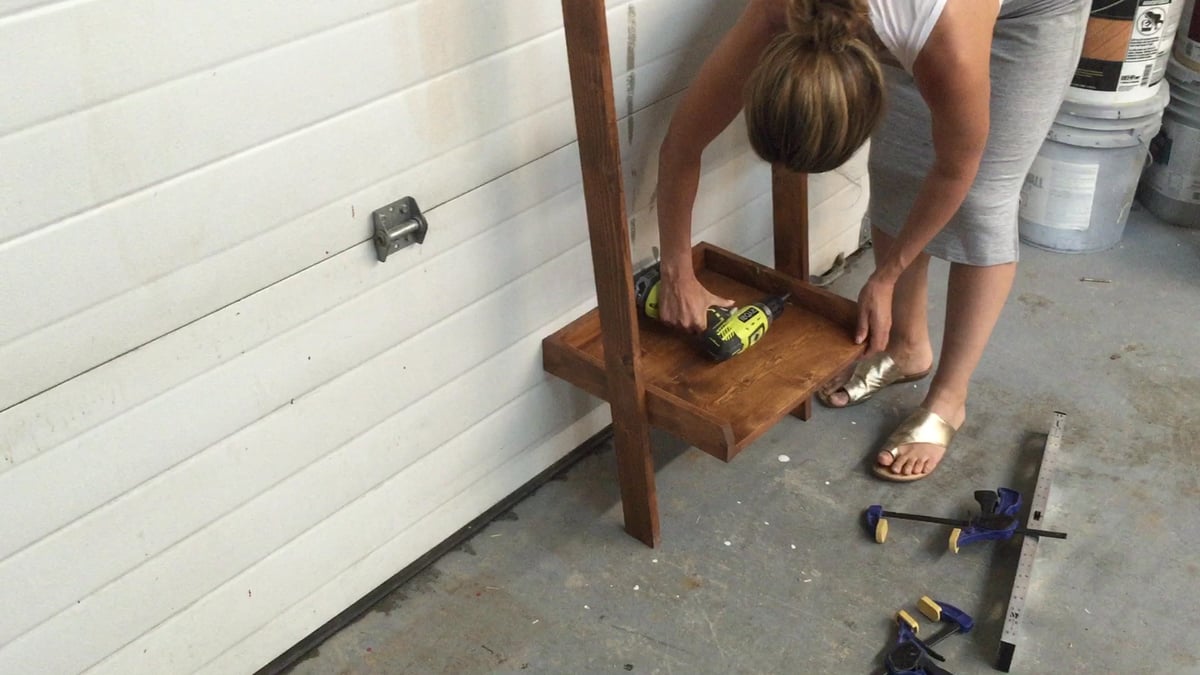
Then I screwed the shelf to the legs with 1-1/4" screws.


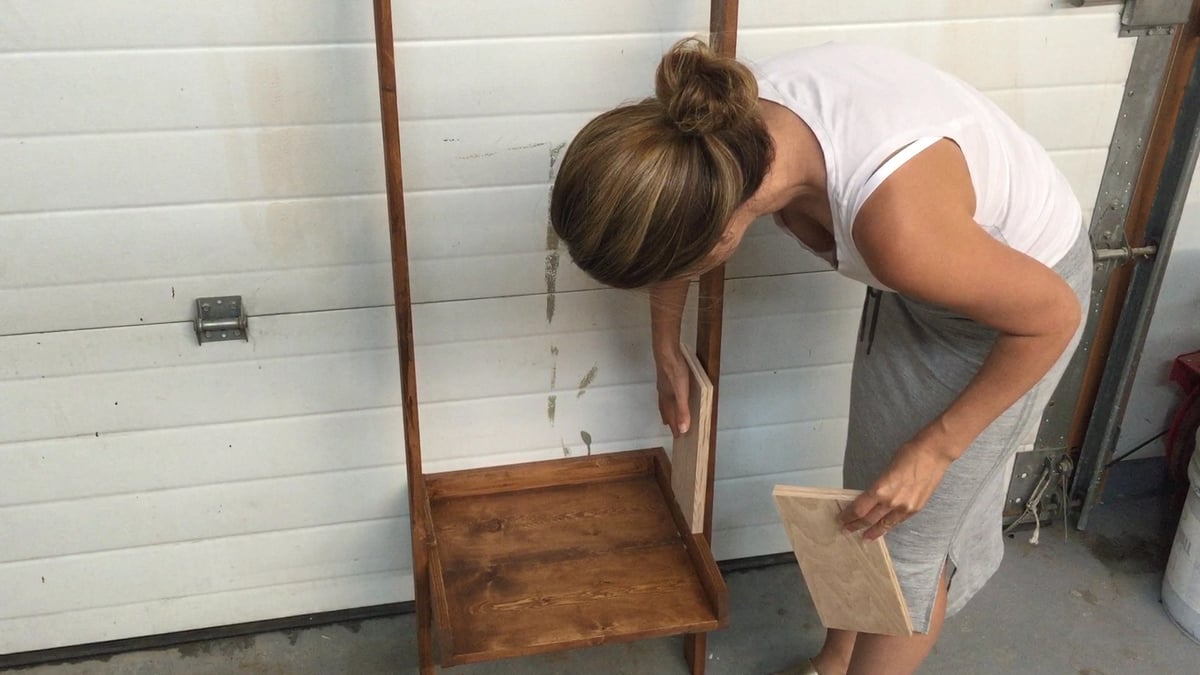
Then I cut two plywood blocks exactly 11" in height and set them on top of the first shelf.


Then I just set the next shelf on top of the blocks, and screwed it in place.


And repeated those steps for all of the remaining shelves.

This saved a ton of time and frusturation, as placing those shelves can be a pain, especially if you are having to measure around lower shelves.


Another little tip is I built the two bookshelves before the main desk piece.  Then I clamped the desk legs to the bookshelf legs (see in photo above) so the legs matched exactly.  Then when I went to put the shelves in in the desk, I just matched them up with the shelves in the bookshelves.  This made installing the desk shelves much easier too.

The leaning ladder bookshelf plans follow (if this is the homepage, you'll need to click READ MORE below).  You can find the leaning ladder desk plans here. 

Enjoy! XO Ana

Toy Storage Bin Box with Cubby Shelves

$
0
0

Good morning friends!  

I'm so excited to share this project with you!  You've seen a sneak peek on Instagram, and for those of you who subscribe on YouTube, you've seen the video -

PS - I love you for following and supporting so thank you!

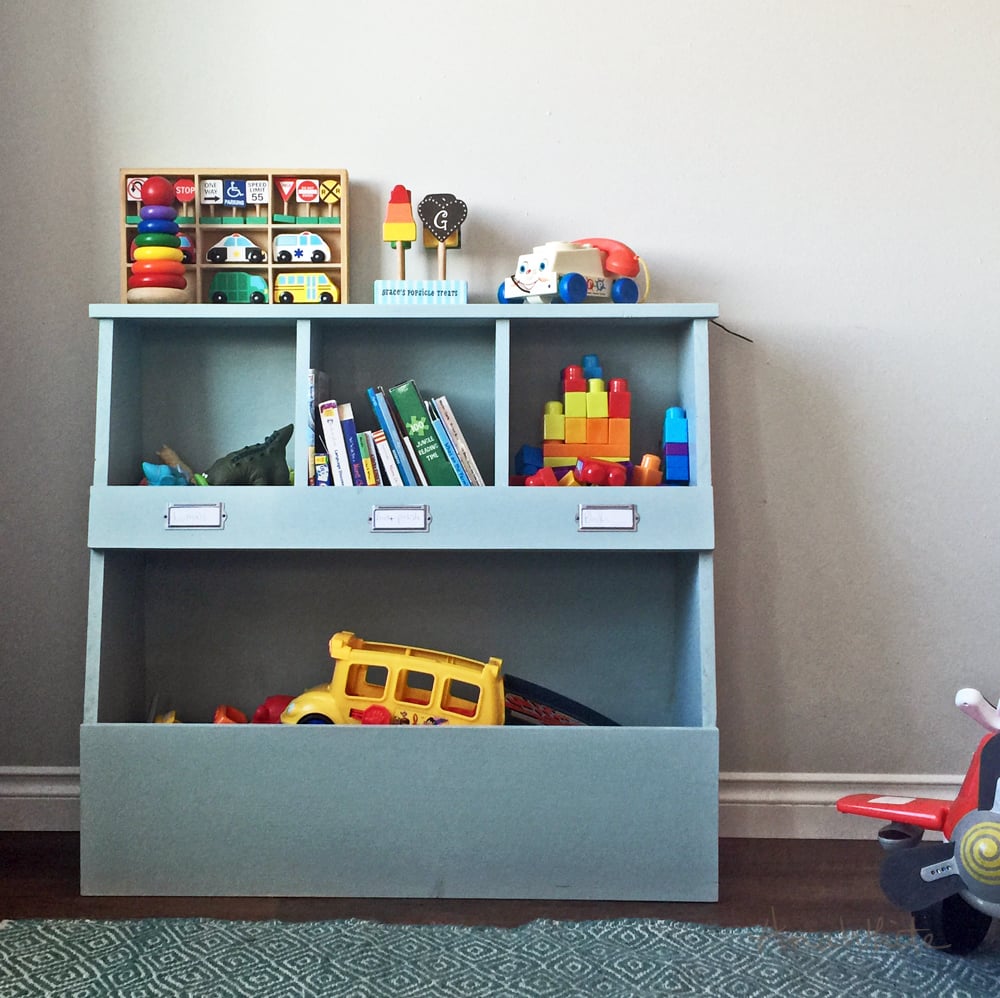
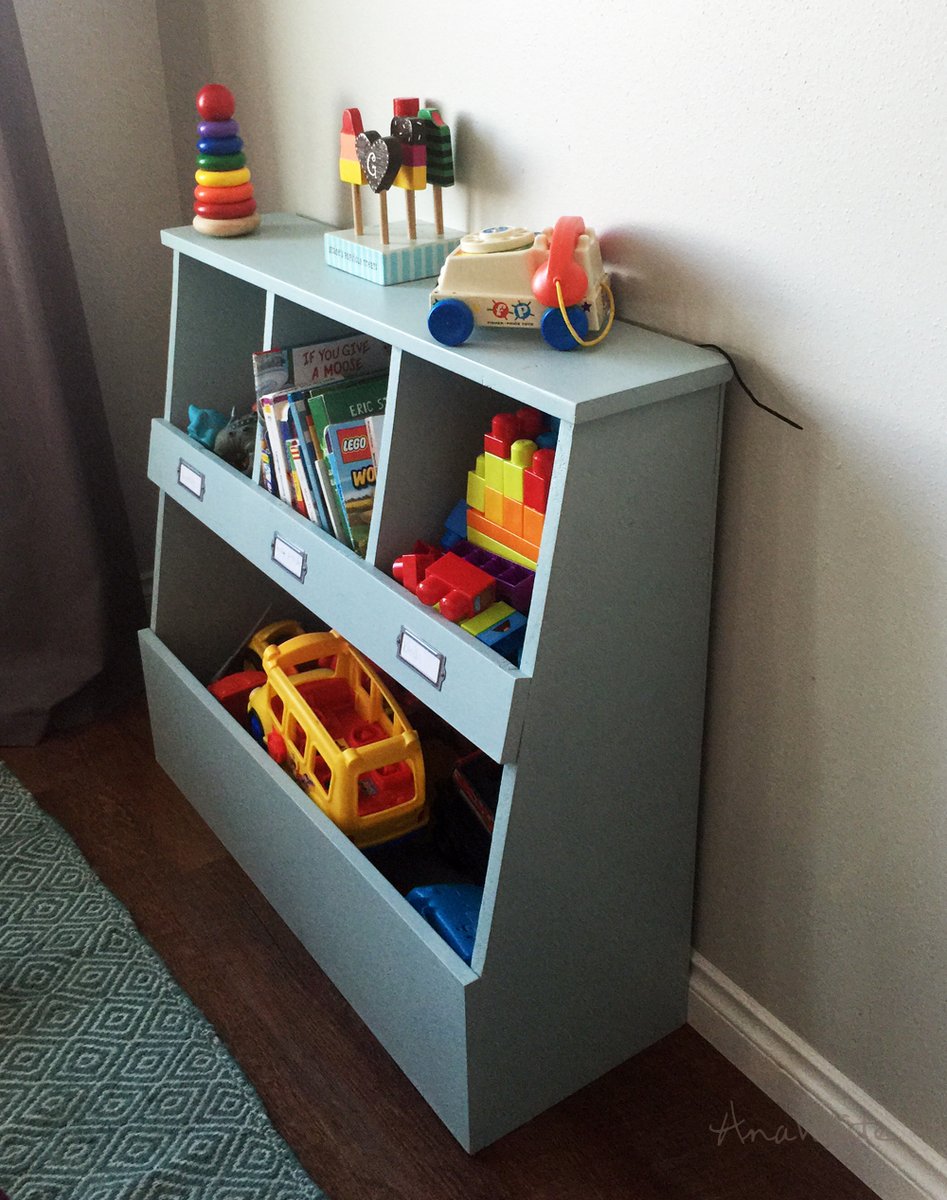
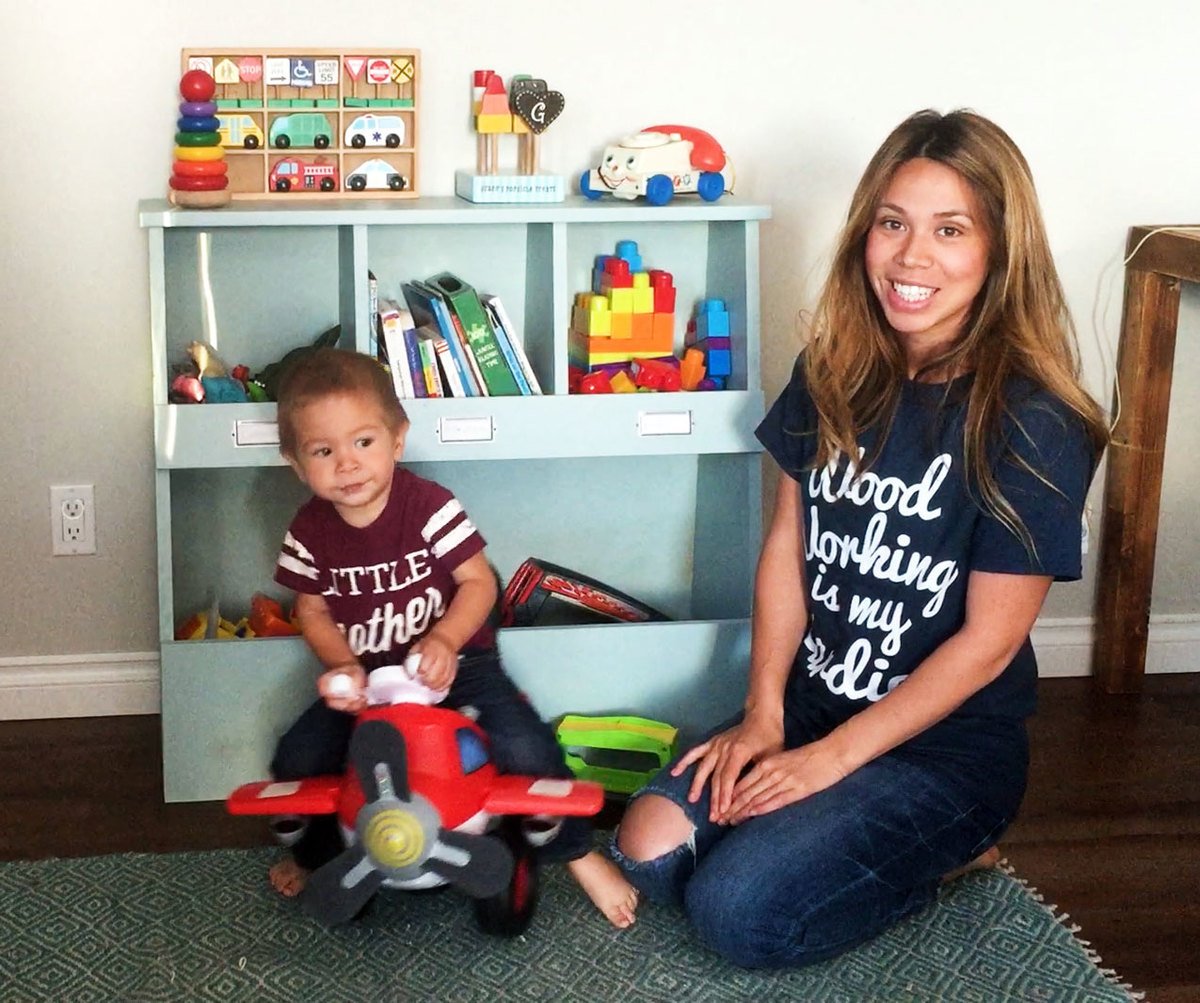
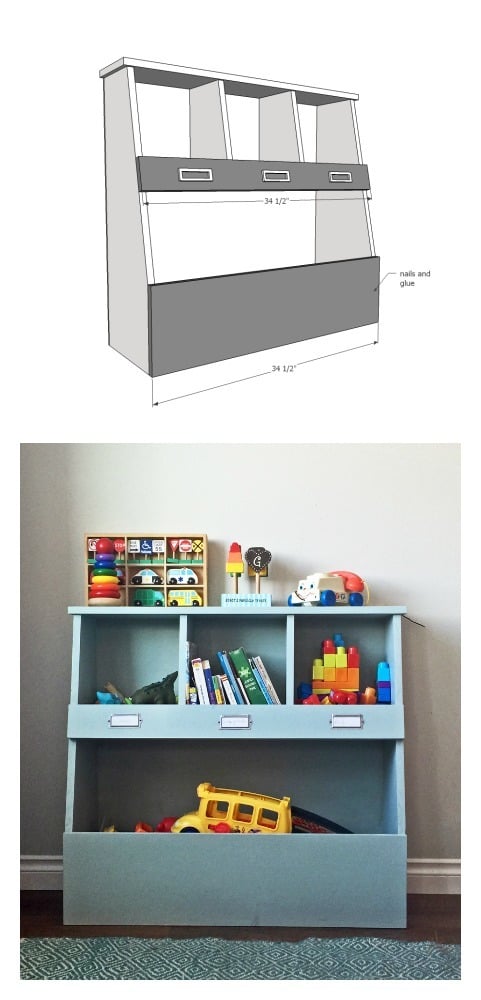
It's the new thing in toyboxes - vertical toy boxes!!!  You know, where you still have all the awesomeness of telling your one year old to throw his toys in a big wood box - but on top there's smaller storage cubbies so you can organize littler toys.

The top also serves as a smaller shelf for smaller toys, books, games, or even decor.


We love this thing so much and are giddy excited to be sharing the plans with you today.  Or at least I am.  He just wants to dig his toys out and play with them.

You'll love that this plan is all from 1x boards.  I've done alot of head scratching and plan re-working to optimize the boards so the project is as inexpensive and easy to build as possible.  Friends don't make friends buy an extra 1x12 when you really only needed a couple of inches.  I got your back!

The detailed plans follow (you'll need to click READ MORE below if this is the homepage).  Also do watch the video - it's got a lot of little tips and tricks in it that will not only make building this toybox easier, but stuff that applies to building in general.  That, and you are of course dying to see my messy shop.  

Pin to your build list right now!

Enough of me chattering, you've got a project to build!  

Have an awesome day!

XO Ana + Baby

HOW TO: Build a Vintage Gas Pump Cabinet with Side Bookshelves

$
0
0

Hi there, and Happy Friday!  Happy Handbuilt Holiday too!

For those of you who may be new here, each year, Jaime from That's My Letter and I put on a series of new, free gift plans every Friday in the weeks leading up to Christmas.

I adored last weeks project plan -

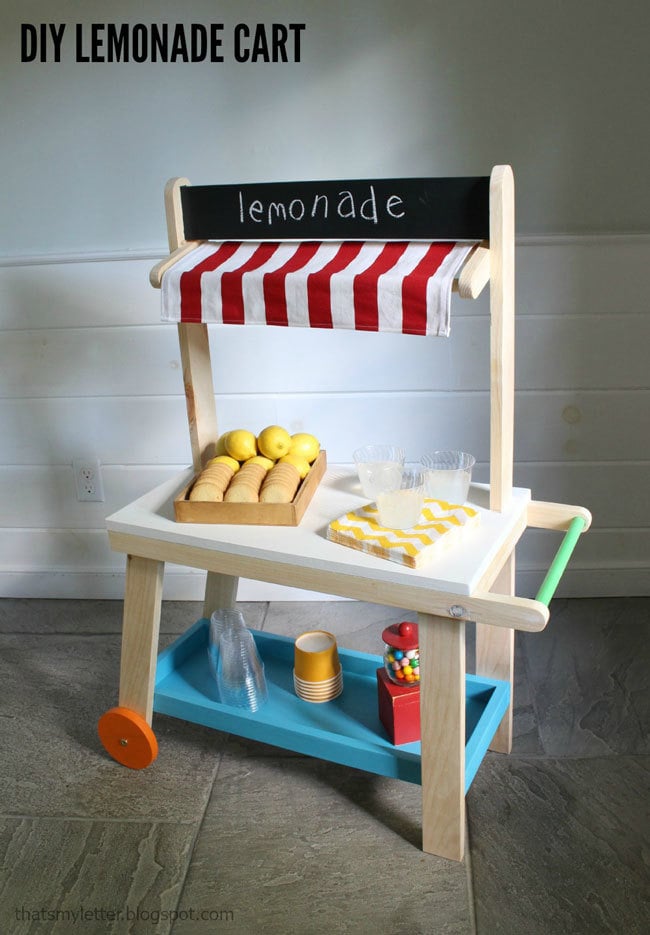
This little DIY Lemonade Cart that you can make with scrap wood!  There's tons more gift ideas too here, so please do take a second to browse through and create your Christmas build list!

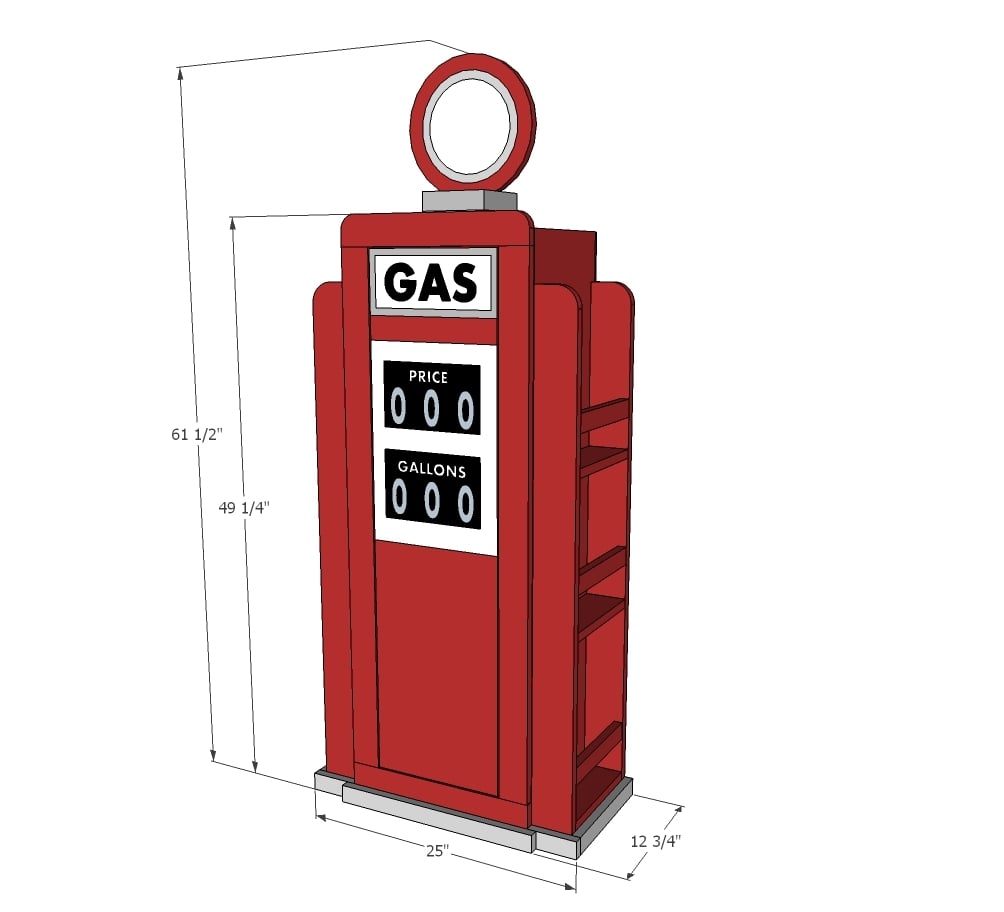
I'll have to admit, I was a little hesitant about this week's Handbuilt Holiday gift.  Jaime wanted to build a vintage gas pump bookshelf. 


source

As in convert this into a piece of furniture for a kids room.  Hmmmmm ...

Well, we went back and forth a few times with design ideas, and finally came up with this -

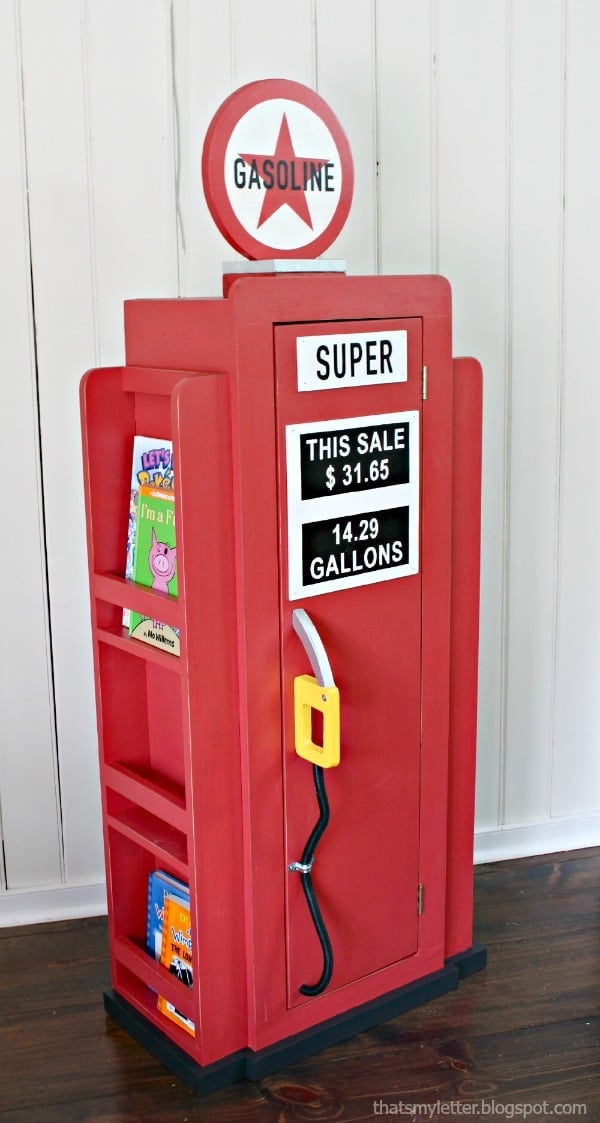
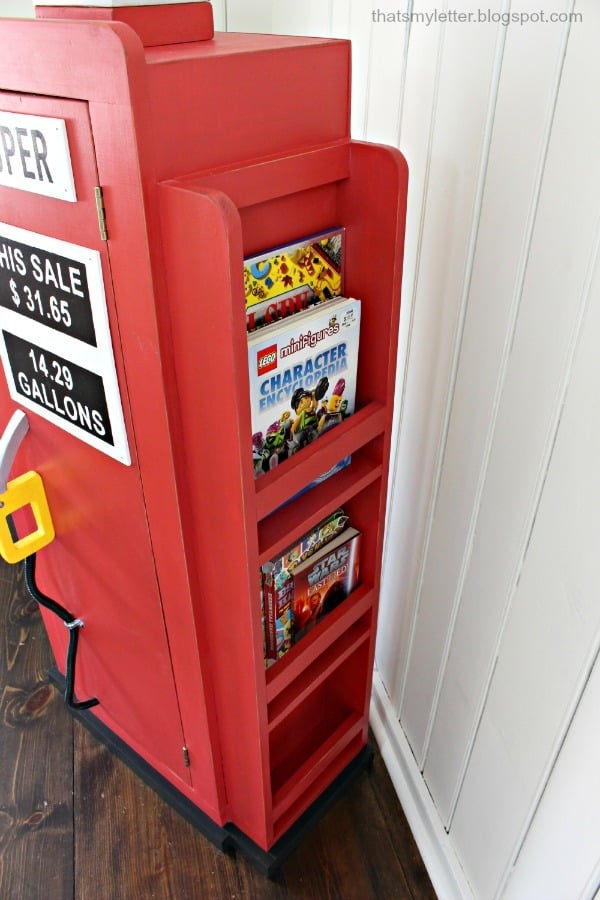
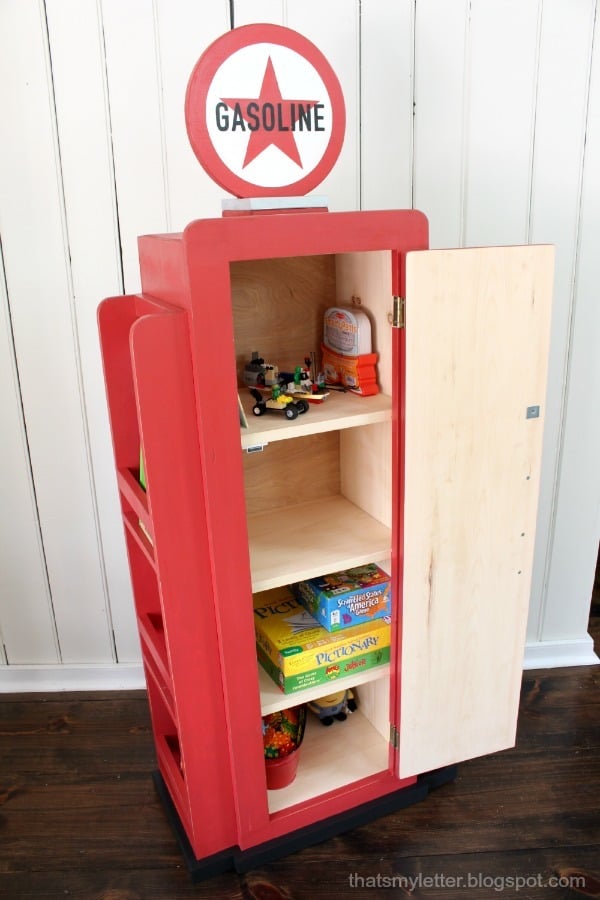
And this is what Jaime built from the plans!

Whoa!!!  The gas pump handle really took this one over the top!!!

To exaggerate the shape of a vintage gas pump, but in such a way that adds functionality without creating building complexity, we added flat bookshelf ledges to the sides.  It's maybe my favorite part of this project!

Inside the project is four shelves to hide bigger or less attractive toys.  

This project would be so perfect for a boys room!  My son loves cars, With a fun play rug -

And some fun sheets -


All you'd need is a car themed bed!

Photo uploaded to Pinterest via Kristine Miller

We gotta do a car bed sometime soon!  I so wish my boy had his own bedroom.  I'll have to build and decorate vicariously through you until we get a bigger house.

The plans follow, but make sure you take a second to check out Jaime's building post with lots more photos and details on how she built and painted this beautiful vintage gas pump bookshelf cabinet!

Have an awesome, enjoy the plans (if this is the homepage you'll need to click READ MORE below)!

XO Ana + Friends


CLICK HERE TO READ JAIME'S BUILDING POST AND FOR MORE PHOTOS


Modern Dollhouse Bookshelf

$
0
0

Hi everyone!  It's Friday, it's Handbuilt Holiday time!

Are you as excited as I am about today's project?

Jaime from That's My Letter and I wanted to do a dollhouse bookshelf for you this year.  

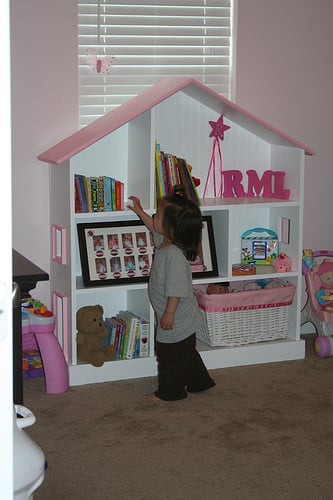
We love this tradditional dollhouse bookshelf (you can get the plans here) and are so happy to see so many people have used and enjoyed those plans.  

And especially love seeing all the custom versions that you have come up with from the original plans.

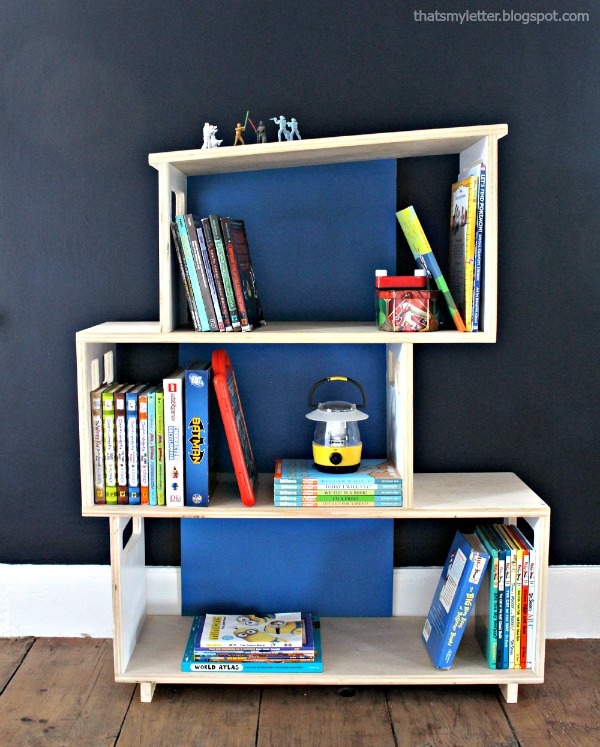
So this year, we wanted to do a more modern shape to give you more options, and perhaps provide plans for a house shaped bookshelf a little less on the girly side.  

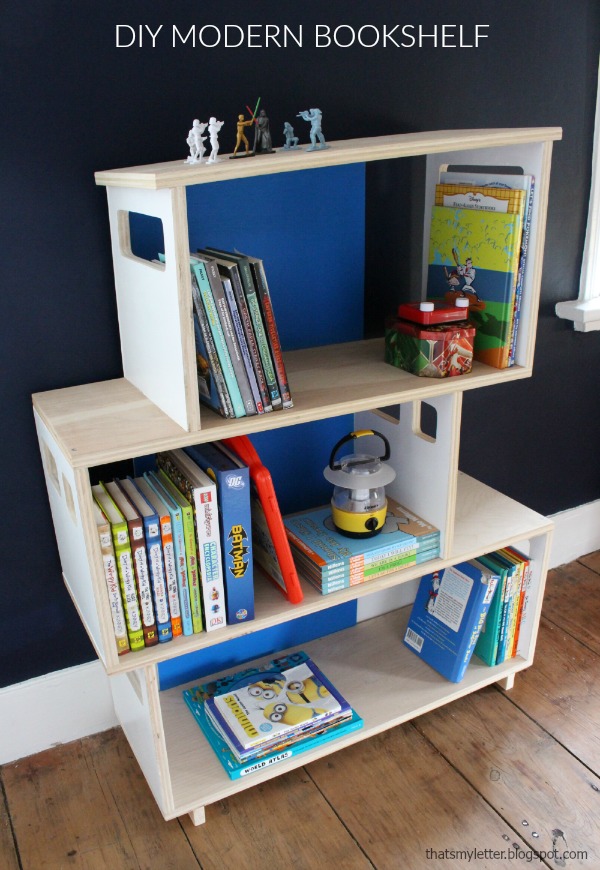
Sooooo .... after lots of thought and many emails back and forth ... Jaime and I came up with this!

A modern style dollhouse bookshelf!

What do you think?  I am so happy with how this project turned out!  

You can build your own - the plans are simple, the steps are easy.  Just follow along in the tutorial below (if this is the homepage, please click READ MORE below).  But before you get to the plans, please take a quick second to check out Jaime's building post, and see LOTS more photos and building steps! 

Can't wait to see how your's turns out too!

Have a great weekend!

Ana


CLICK HERE FOR JAIME'S BUILDING POST AND MORE PHOTOS


Triple Cubby Storage Base (Inspired by Pottery Barn Kids Cameron Collection)

$
0
0

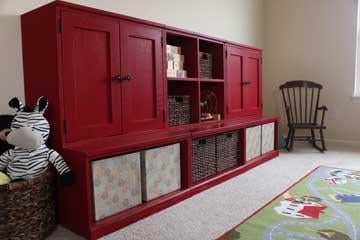
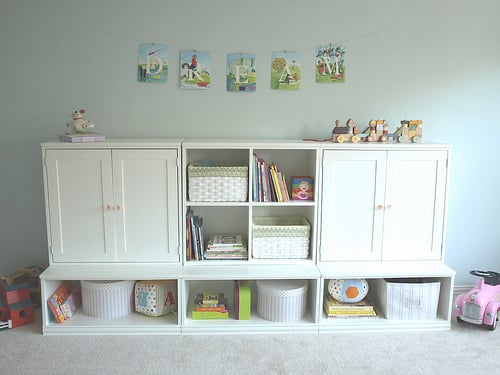
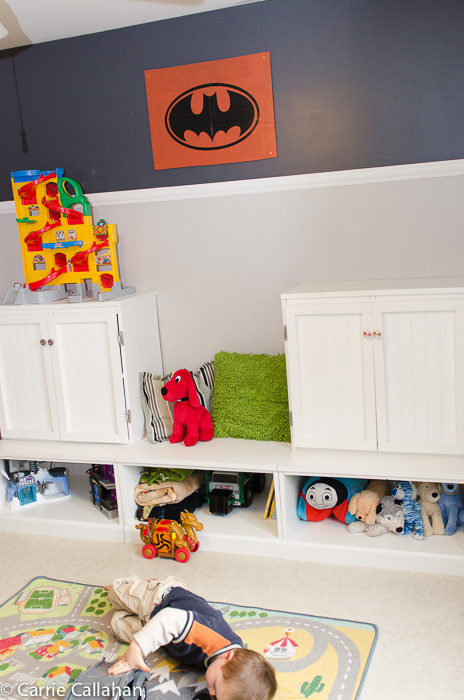
Shall we take a second to oooh and ahhh over all the amazing DIY builds of our Cubby Storage plan collection (of course inspried by Pottery Barn Kids Cameron Storage system)?

Built by Kris Kraft

Built by Shanty2Chic

Reader contributed project

Built by BowerPower  When was Will this little???  

Shared by Marla Dubyak on Facebook (total cost just $200 finished!?!?!)


Built by Our Blessed Nest

Contributed by Becky's Nest

Reader contributed

Built by My Creative Escapes

Are you as convicinced as I am that this is THE perfect storage solution for a toy room or kids room?  I am sold.  This is exactly what I need for our playroom!

We've got a whole collection of plans (and I might just have to add a few more plans for you too!) so you (and me) can build this storage system.  Check them out!

Now I know this collection is as cute and perfect as it gets, and I know better than to mess with that ... but what happens when you just got one sheet of plywood and big dreams to make the kid clutter go away?

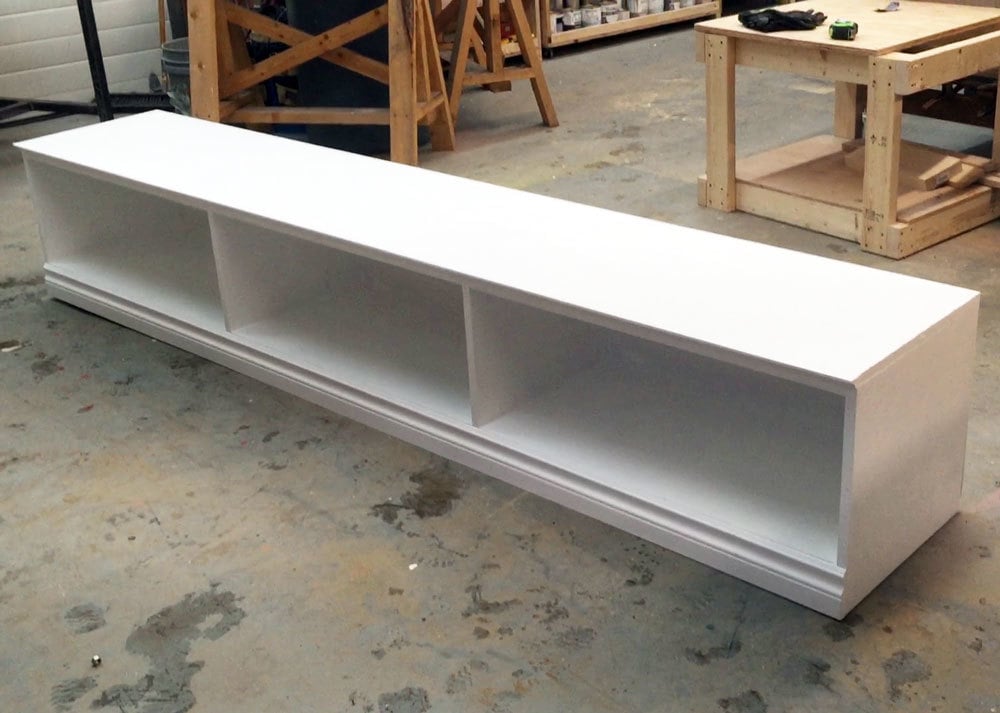
Well, you build three bases in one.  Now we've sacrificed some width (about 3") and there's not as much trim in between the units - but it's DONE.  In a matter of hours, with just one sheet of plywood.  Shall we call this the lazy busy mom's hack to the cubby storage?

Check out the step by step of how we built this project in this video.  I do apologize about rambling on and on and on about cutting ... a girl's gotta be passionate about something!  Might as well be cross cutting right?

And of course, the step by step plans are below. 

Build, enjoy and share!  We can't wait to see how your project turns out too!

XO Ana + Family

DIY Bucket or Basket Shelf Display Stand

$
0
0

Hi everyone, hope you had a wonderful Thanksgiving! Ours was pretty quick as we had to travel 350 miles to a hockey tournament for Grace.

photo via Instagram

The roads were awful but we made it!

I'm a little sad that we are getting so close to Christmas, because that means our Handbuilt Holiday series will come to an end.

If you are new to the Handbuilt Holiday series, it's pretty simple.  Jaime from That's My Letter and I team up to get you a new gift plan each Friday in the weeks leading up to Christmas.  You can check out all the plans we've done so far (over the past few years) here.

I'm especially excited about today's project!!!  It is so darn simple.  But so effective and useful!

All else pails in comparision!

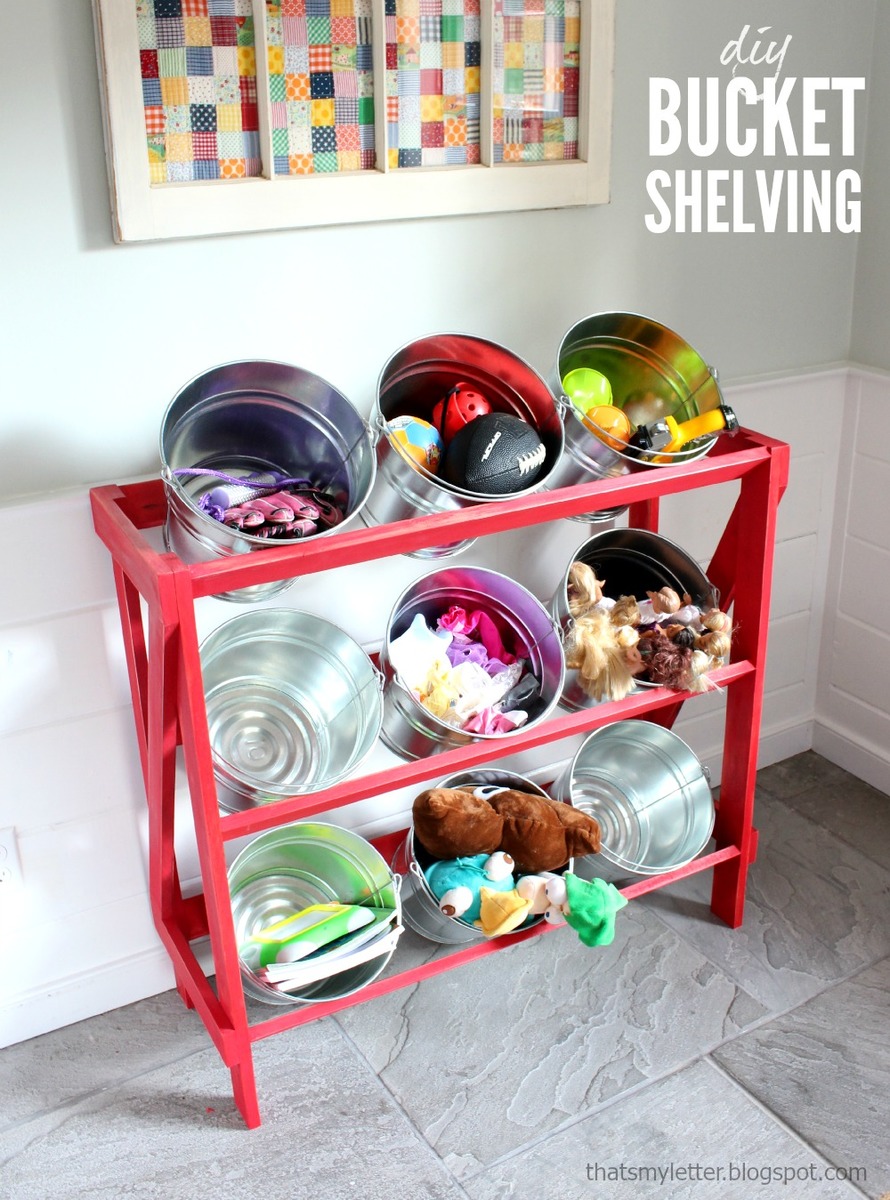
May I present the bucket shelf!

When my son turned one, a friend gifted him with some baby toys, but instead of gift wrap, she placed the toys in a bucket.  I was so suprised at how much our baby loved the bucket, and played with it.  Buckets are great for storing all sorts of things, from toys to produce to all things entryway and beyond!

This shelf designed for buckets (this bucket was used) is especially awesome because its so easy and inexpensive to build!  The frame is just 1x3 boards - that's all.  It doesn't get much cheaper or easier than this!

So you ready to make this?

Here's what to do -

- Go check out Jaime's build post with lots more photos and building tips

- Grab the free plans below (if this is the homepage you'll need to click READ MORE below)

Enjoy the plans!

Ana


CLICK HERE TO READ JAIME'S BUILD POST ON THIS BUCKET SHELF


Sliding Barn Door Media Wall Suite

$
0
0

Just wanted to say thank you to all of you who are part of our amazing Facebook page!!!  Not only are you all serving up tons of inspiration by sharing your projects, but many of you take the time to answer other's questions and offer encouragement.  I'm humbled to be a part of this community!

As a small thank you in appreciation of your awesomeness, I started a new thing on Facebook - 

It's pretty simple.  When you see this graphic on Facebook, comment with a link of something you'd like to see me put plans together for.  I'll pick one and put the plans together!

This week was so hard to pick a project!  There were so many great ideas!  

In the end, I choose to tackle a sliding barn door media console for you all!

Project inspiration from Cost Plus World Market

This was requested by a few of you.

And with the popularity of this sliding barn door console project -

I hope this full wall unit is a crowd pleaser too!

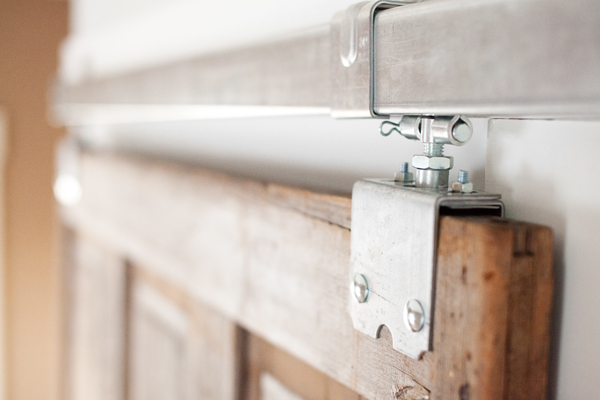
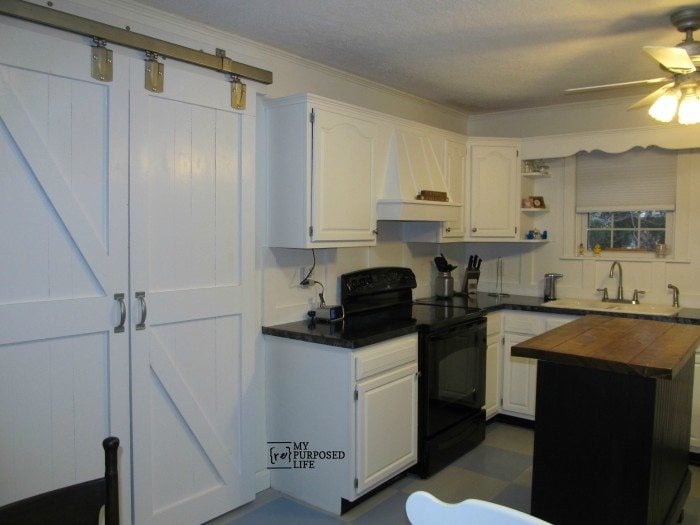
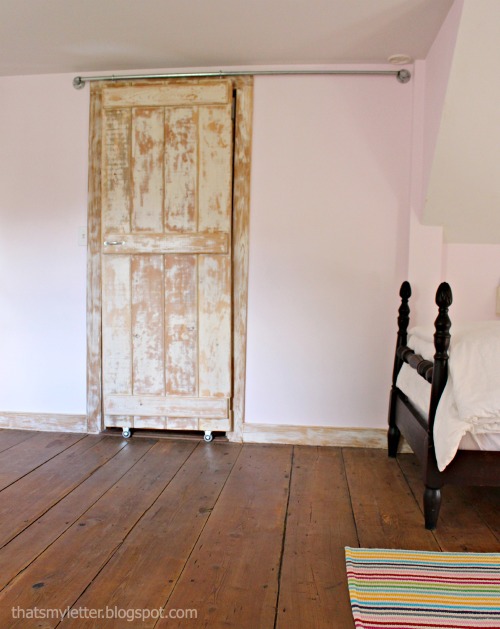
Definitely the trickiest part of this project is the hardware.  You can of course just buy a track kit, but it will cost you a pretty penny to get an 8 foot long system.

So here's a few options - 

Exterior Barn Door Hardware by the Lettered Cottage for $85


Tractor Supply Barn Door by My Repurposed Life

Pipe Track and S Hook Barn Door by That's My Letter


Drawer slides (use 24" full extension) hidden behind the door by Kristen Duke

Whatever route you do go, please choose a method that glides smoothly, as these are big doors!

And one more comment I have to make - this project is huge!  It may not make it up stairs, around tight corners, through shorter doorways, etc - I've made the height 78" so it should pass through a standard interior door.  You may wish to assemble the project in the room if you don't have a clear direct enterance into the room.

Plans follow!  

Enjoy the rest of the weekend!

XO Ana

How To Upgrade Bookshelves - Featuring Pneumatic Addict Furniture

$
0
0

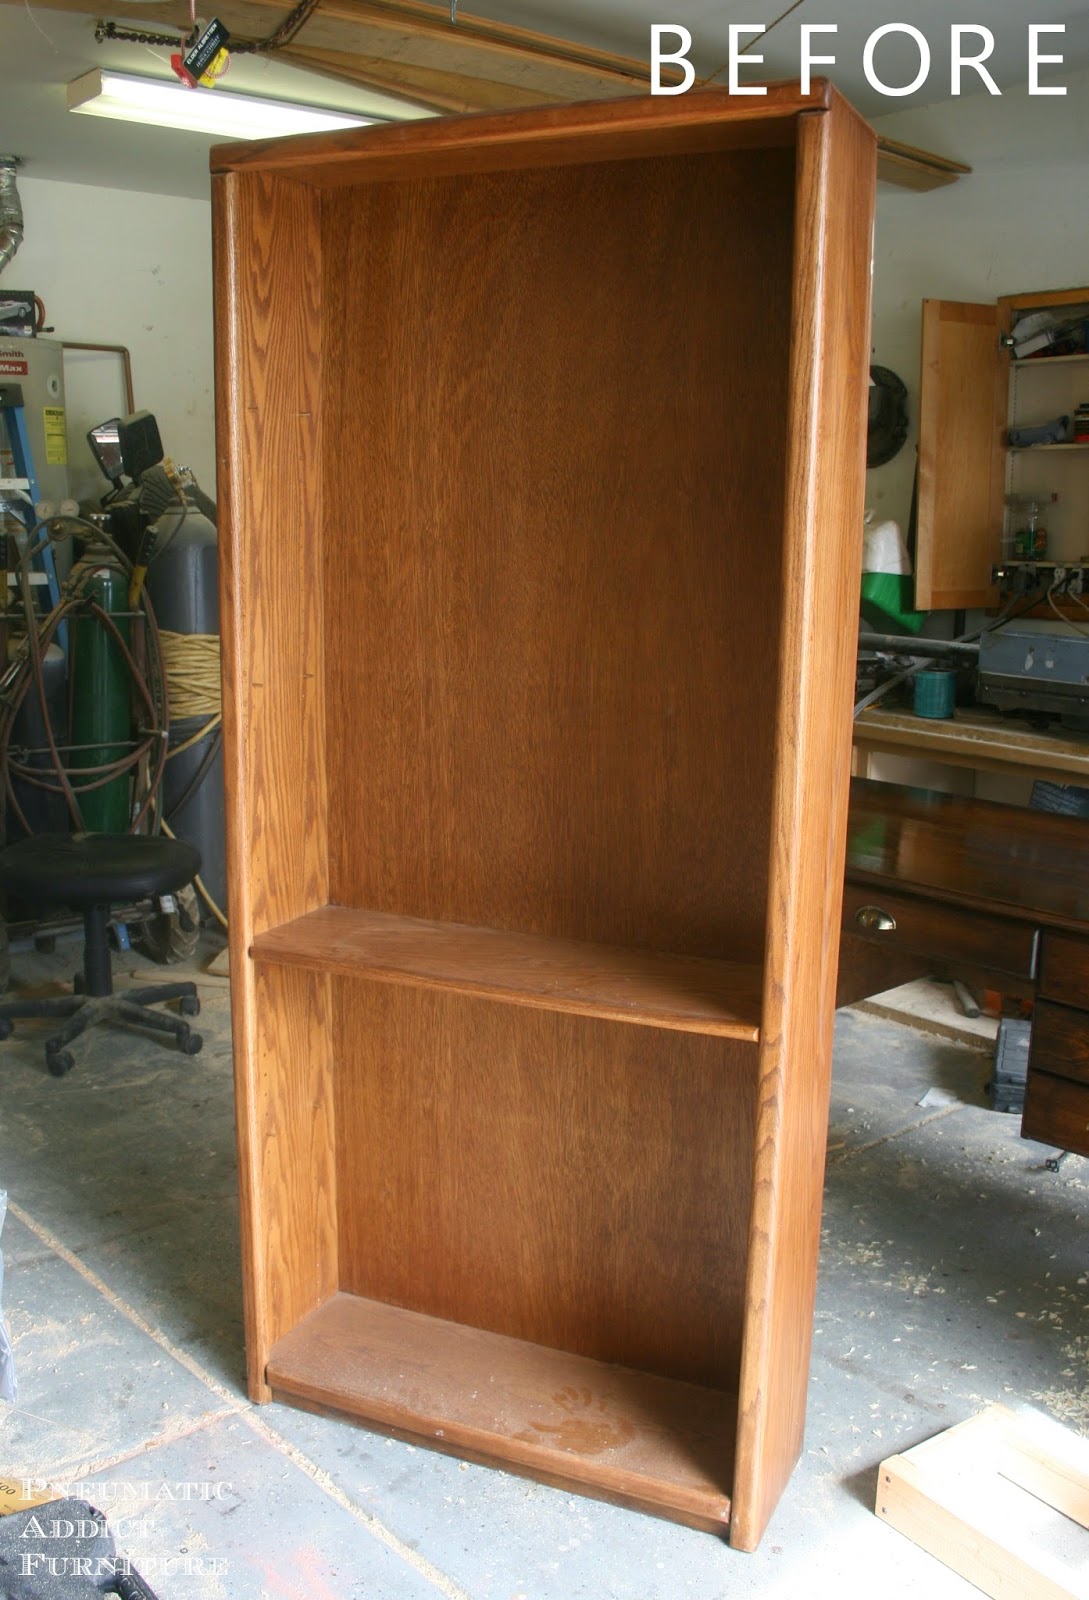
You know those older, heavier, aka "made with real wood" bookshelves that you come across from time to time. You may find yourself thinking, if I were to purchase those how could I make them "more attractive". Look no further because Pneumatic Addict Furniture has taken out the guess work!

Need I say more? So next time you see a pair of "real wood" bookshelves and wonder what you could do with them, have no fear and give them a little lift!

Check out the full tutorial at Pnuematic Addict Furniture!

CLICK HERE FOR TUTORIAL

Custom Cabinet Base - Featuring Shades of Blue Interiors

$
0
0

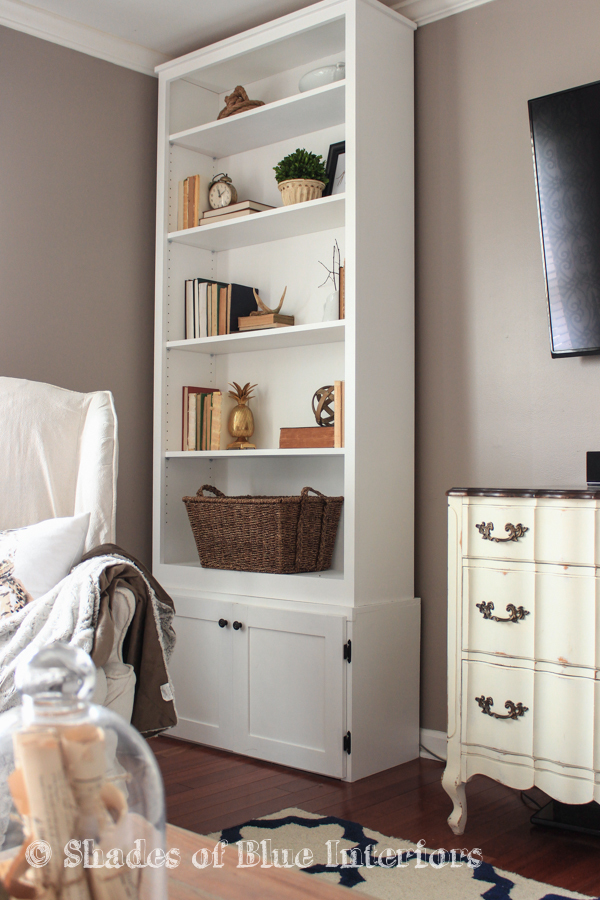
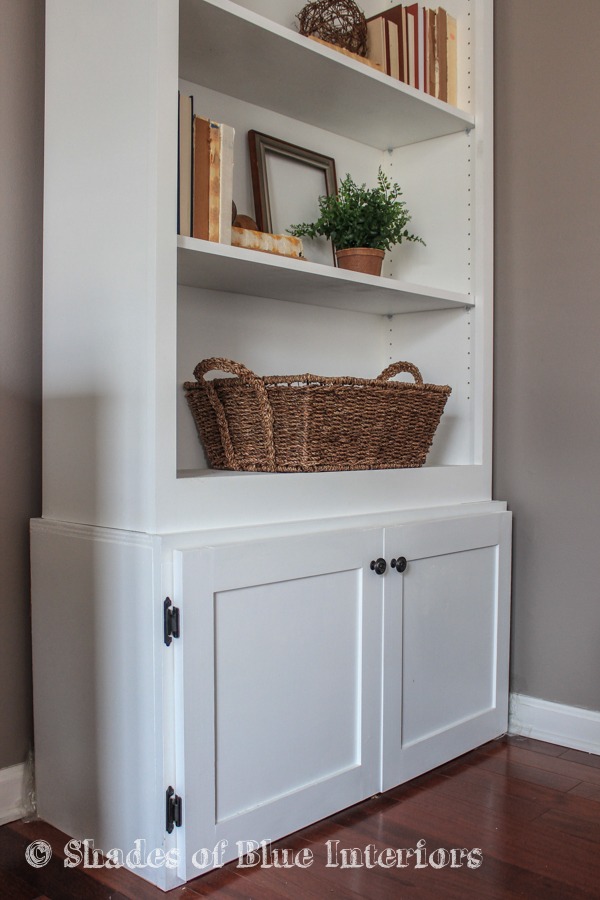
Here's a simple way to make a bookshelf more functional, just add a base cabinet. Shades of Blue Interiors shows us how in this tutorial.

Just like that, a new place to store books, DVDs, game boards. I especially appreciate the building up instead of out factor for added storage, no wasted space!

Check out Shades of Blue Interiors for this great project!

CLICK HERE FOR TUTORIAL

DIY Bookseller Shelf - Featuring Lady Goats

$
0
0

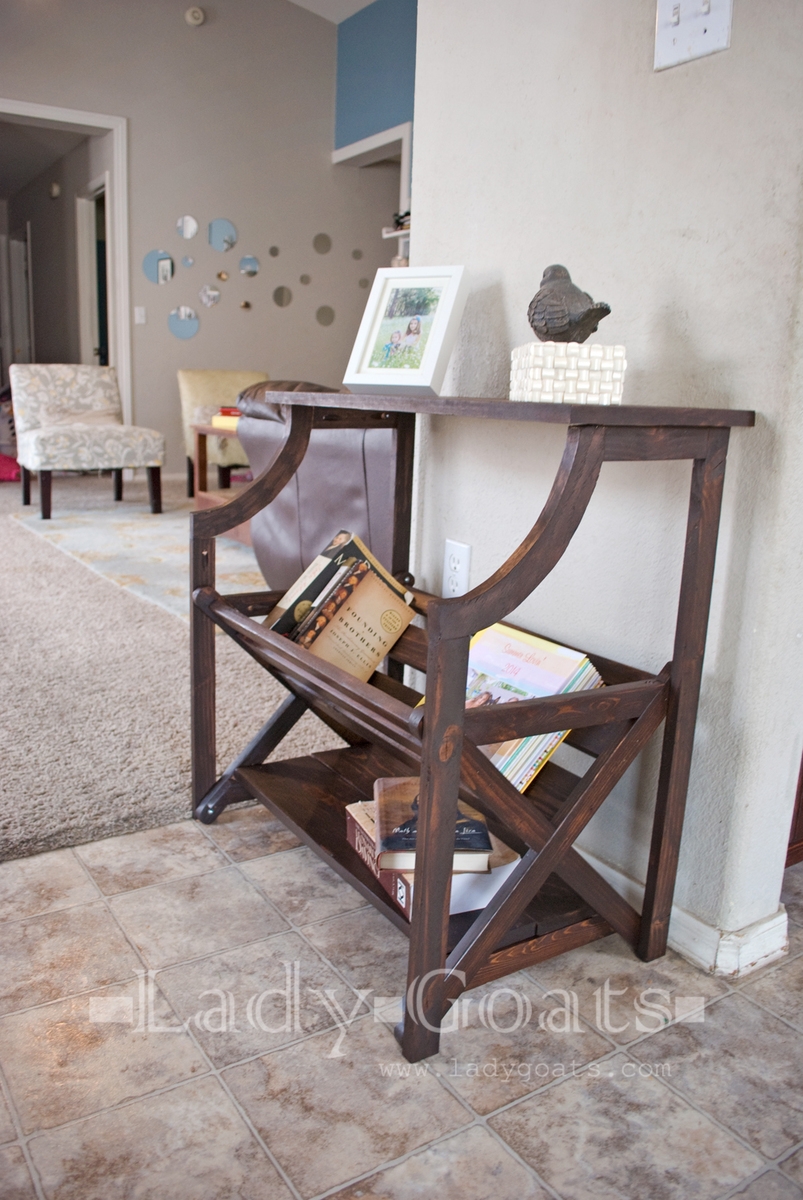
Another $20 project, can you believe it! Lady Goats was kind enough to create a simple plan to build this! 

It all started with this cute little X Book Caddy.

BUT, Lady Goats wanted to make it a bit more sophisticated, and was inspired by Pier 1 Imports Bookseller Shelf.

Gotta say, I love Lady Goats! Anything this good and affordable is a must build, so go ahead and add it to the list!


Easy Wood Slat Swedish Style Shelving

$
0
0

Hi everyone! 

I'm so glad you all loved the indoor playground bunk bed monkey bar project we made for our kids last Christmas -

Here we are, a few months later, and the kids still LOVE it!!!

In fact, the kids still love it so much, that they've moved all of their toys downstairs into the room too!

Part of me was celebrating no longer having toys scattered around the living room (and let's just be honest, the kitchen, under the dining table, down the hall - everywhere upstairs), and the other part of me cringed when I went downstairs .... and the chaos was just piled up everywhere.


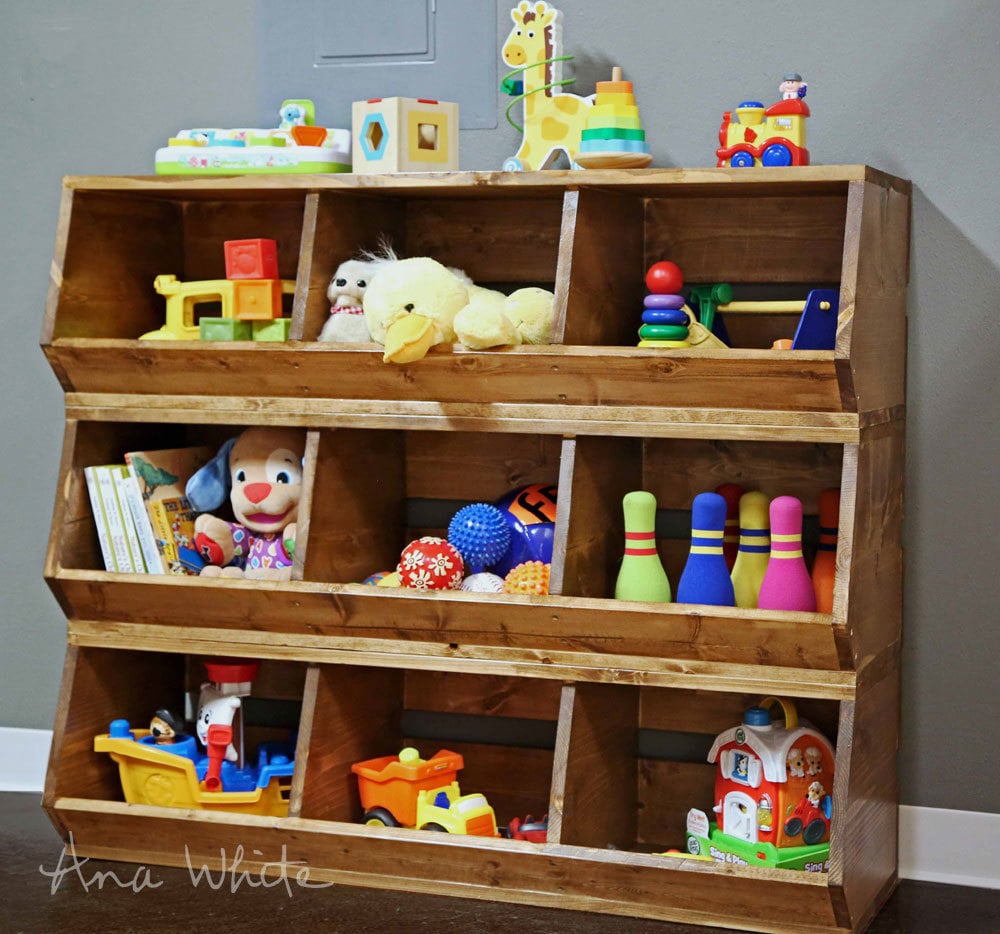
So we made these bulk bins out of 1x12 boards for the baby's toys - and that picked up quite a bit of the mess.  It also is a fast and easy way to put away all the small toys that our baby loves to play with.  I'm fantasizing about the day when he puts his own toys away.  

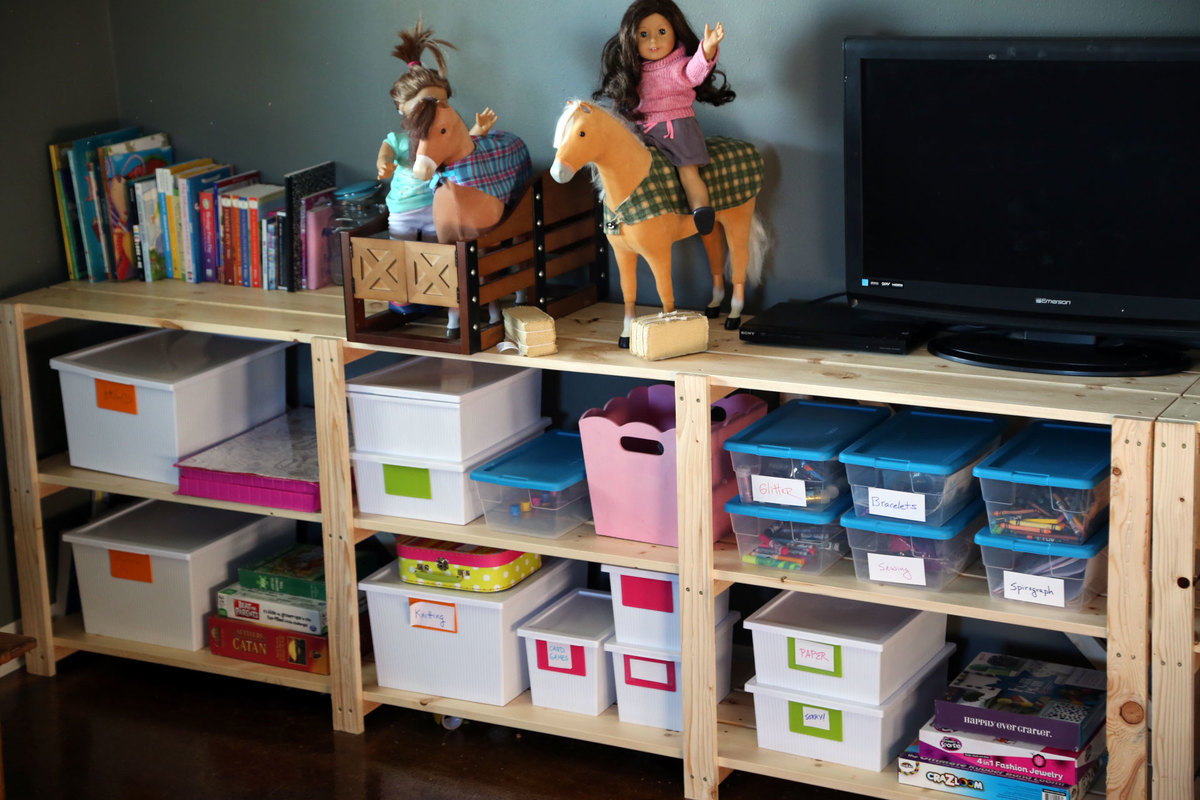
So now what to do with big sister's stuff?  Grace loves arts and crafts, second only to hanging upside down on monkey bars, and recieved so many craft kits and supplies for her birthday and Christmas, I was wading through them.  I had wanted to make pretty shelving and perhaps paint it cute colors, but the mess was driving me crazy.  I needed shelving now, I needed it fast, and it had to be deeper than a 1x12 board width.

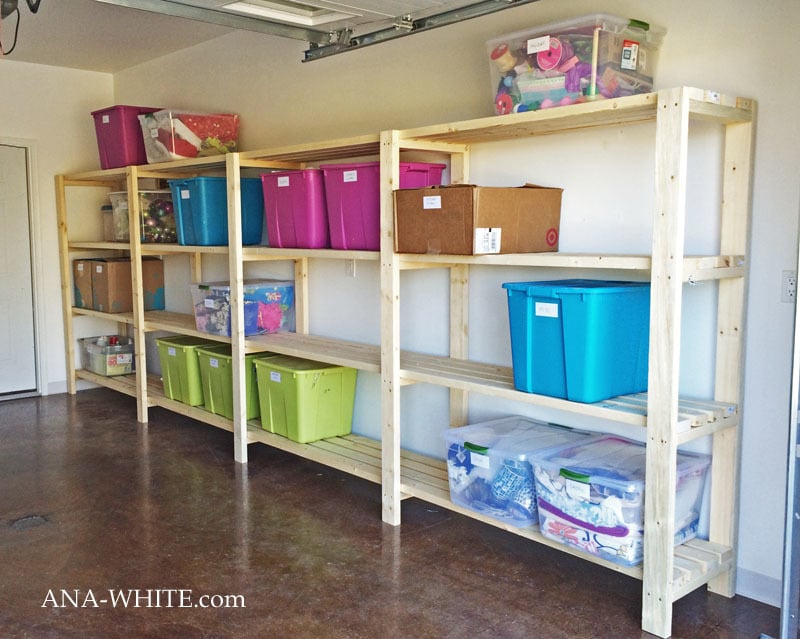
We are very happy with how this garage shelving turned out - 


And my master closet is one of my favorite things ... ever. 

Although it certainly doesn't look this sparse and staged in real life now with both the hubs and my clothes crammed into it.

Both of these projects were ridiculously simple, fast and economical to make, so I thought, why not make playroom shelving?  

So I made this shelving the full length of the playroom.

Because the shelves are all wood 1x boards, I didn't have to deal with plywood, but got a nice deep shelf (much deeper than a 1x12 width).  The shelves also allow stuff to "breathe".  I just wish I'd had the time and weather (it's still winter in Alaska) to stain or paint this project - maybe next summer.

I also put together a quick video on the steps I took to make this shelving, so check it out -

Thanks so much for reading and using my plans.  If I haven't told you lately, I appreciate your support and am humbled to be able to create plans for you.

XO Ana


Reclaimed Wood Rolling Shelf

$
0
0

Hi there!  I'm so excited today to get to share with you the very first of the furniture plans for our Alaska lake cabin!!!

You'll have to watch the show when it airs on DIY Network to see the whole room, and how all the pieces fit in, but I'm so thrilled to be able to share the individual plans with you before it airs.  Yipee!

After building the cabin, we ended up with quite a bit of scrap wood leftover.  We had to over-order on materials since the cabin is so remote.  Being out a 2x4 means an entire day of driving to go get another one.  

So we decided to build all of the furniture from the leftover wood.  For each piece of furniture, we would go down to the scrap wood pile, figure out what we had left in material, and make something out of it.  By the time we got to building a pantry in the kitchen, there wasn't much left, espeically wider width boards, but we did have some rough cut 2x4s leftover from the exterior siding.

I've always loved this piece from Restoration Hardware (and there's lots more similar styles made by different companies)

Not that they would ship to remote Alaska, and even if they would, $2500 is way out of my budget.  So here's my opportunity to build and use and love it!

Built for less than $50!!!  Pretty much all of the budget was spent on hardware and casters and screws.  This project was built by Ross, a good friend of ours that helped out on the cabin.

Very funny Ross.

I built mine out of rough cut Alaska Sitka Spruce to get this texture on the wood.  To get rid of the splinters, I used a sander with 120 grit sandpaper over top of the rough cut. This left the saw marks, but made the final finish smooth to the touch.

Rough cut lumber is availabe at local saw mills, and is often considerably cheaper than kiln dried lumber.  Of course, if you can find salvaged wood or reclaimed wood, that would even be better.  And using good old 2x4 boards would work too, but you may not get this same texture in your wood.

For the hardware, I used metal caster wheels, corner brackets and EMT pipe, all spray painted black with Rustoleum Spray paint in black.  The wood was stained using Varathane Early American.

I'll be using this shelf as a pantry in the kitchen.  A few random baskets (striped totes are from Target) and it's one of my favorite pieces in the cabin!

So your turn now!!!  Plans follow, enjoy!

XO Ana

DIY Kids Bookshelf

$
0
0
DIY Kids Bookshelf

Isn't it great to see what you can make with just one board?  Well you can make your little one this DIY Kids Bookshelf with only a 8' 1x8.  You could also substitute other 1x material for these pieces, so don't feel overwhelmed if that sounds like too much cutting!


The bookshelf is put together with pocket hole joinery and brad nails for easy assembly.  Go check out the DIY Kids Bookshelf page at FixThisBuildThat.com for the full tutorial!

Floating Shelves

Octagon Rotating Bookshelf Featuring Her Tool Belt

$
0
0

Today we are sharing this sweet little shelf! An Octagon Rotating Bookshelf, that would be a perfect addition to a small space or used in a corner. Check out all that storage!

I can visualize multiple uses for this rotating shelf, think about it....... maybe jewelry storage with a mirror on one side, a display for knicknacks, how would you use it?

Her Tool Belt has a lot of cool projects, add this one to the list!

http://ana-white.com/sites/default/files/default_images/clickforplans.jpg

Leaning Ladder Wall Bookshelf

$
0
0

Hi and Happy Monday!  

Thanks so much for all the comments and likes on the new plans I posted last week for my leaning ladder desk!

And thank you to all of you who watched the video too - I'm glad that putting the extra time into creating video is helpful to some of you!

I promised you I'd share with you the bookshelf plans too!

The bookshelves have been sanity savers for organizing my office.  I love having the different sized shelves to sort out my stuff.  As a working mom, with small children and limited babysitting, my desk has to be super organized.  I don't have time to look for paperwork or clear off my desk to work - it always has to be tidy and everything easy to find.  

Building the bookshelves followed the same steps as the desk, but I made the overall width about half of the desk size (just under 16" to maximize cuts on 8 foot long material), and of course, more shelves.  I love that the shelves are all 1x boards - so no plywood cutting or edge banding to dress up raw plywood edges.

One trick that really saved me a ton of time was this:


I set my first shelf, with 9-1/2" space underneath the shelf.  I used a level and clamps to get everythign just right.


Then I screwed the shelf to the legs with 1-1/4" screws.


Then I cut two plywood blocks exactly 11" in height and set them on top of the first shelf.


Then I just set the next shelf on top of the blocks, and screwed it in place.


And repeated those steps for all of the remaining shelves.

This saved a ton of time and frusturation, as placing those shelves can be a pain, especially if you are having to measure around lower shelves.


Another little tip is I built the two bookshelves before the main desk piece.  Then I clamped the desk legs to the bookshelf legs (see in photo above) so the legs matched exactly.  Then when I went to put the shelves in in the desk, I just matched them up with the shelves in the bookshelves.  This made installing the desk shelves much easier too.

The leaning ladder bookshelf plans follow (if this is the homepage, you'll need to click READ MORE below).  You can find the leaning ladder desk plans here. 

Enjoy! XO Ana

Viewing all 2342 articles
Browse latest View live


Latest Images